(→Cast) |
No edit summary Tag: Visual edit |
||
| (45 intermediate revisions by 25 users not shown) | |||
| Line 2: | Line 2: | ||
{{real world}} |
{{real world}} |
||
{{ImageLinkTV}} |
{{ImageLinkTV}} |
||
| − | {{Infobox Story |
+ | {{Infobox Story SMW |
|image = The Doctor is not happy to see me.jpg |
|image = The Doctor is not happy to see me.jpg |
||
|novelisation = The Time Meddler (novelisation) |
|novelisation = The Time Meddler (novelisation) |
||
| Line 12: | Line 12: | ||
|companions = [[Vicki Pallister|Vicki]], [[Steven Taylor|Steven]] |
|companions = [[Vicki Pallister|Vicki]], [[Steven Taylor|Steven]] |
||
|featuring = |
|featuring = |
||
| − | |enemy = |
+ | |enemy = The [[First Monk]] |
| − | |setting = [[Northumbria]], [[1066]] |
+ | |setting = [[Northumberland|Northumbria]], [[1066]] |
| − | |writer = |
+ | |writer = Dennis Spooner |
|director = [[Douglas Camfield]] |
|director = [[Douglas Camfield]] |
||
|producer = [[Verity Lambert]] |
|producer = [[Verity Lambert]] |
||
|epcount = 4 |
|epcount = 4 |
||
| − | |broadcast date = |
+ | |broadcast date = 3 - 24 July 1965 |
| − | |network = |
+ | |network = BBC1 |
|format = 4x25-minute episodes |
|format = 4x25-minute episodes |
||
|serial production code = [[List of production codes|S]] |
|serial production code = [[List of production codes|S]] |
||
| Line 26: | Line 26: | ||
|clip = The Monk's Tardis is Discovered - Doctor Who - The Time Meddler - BBC |
|clip = The Monk's Tardis is Discovered - Doctor Who - The Time Meddler - BBC |
||
|clip2 = A Surprise for the Monk - Doctor Who - The Time Meddler - BBC |
|clip2 = A Surprise for the Monk - Doctor Who - The Time Meddler - BBC |
||
| + | |thwr = 122 |
||
}} |
}} |
||
'''''The Time Meddler''''' was the ninth and final serial of [[season 2]] of ''[[Doctor Who]]''. This story was the first pseudo-historical: a historical story with science-fiction elements other than the presence of the regular characters and [[the Doctor's TARDIS|the TARDIS]]. (Although there were science-fiction elements mixed with historical facts in a portion of ''[[The Chase (TV story)|The Chase]]'', this was the first full story to combine the two.) |
'''''The Time Meddler''''' was the ninth and final serial of [[season 2]] of ''[[Doctor Who]]''. This story was the first pseudo-historical: a historical story with science-fiction elements other than the presence of the regular characters and [[the Doctor's TARDIS|the TARDIS]]. (Although there were science-fiction elements mixed with historical facts in a portion of ''[[The Chase (TV story)|The Chase]]'', this was the first full story to combine the two.) |
||
| + | It is also the first story to have only two companions - [[Steven Taylor|Steven]] and [[Vicki Pallister|Vicki]] - a format that would become default for the rest of the First Doctor's era and most of the [[Second Doctor]]'s, with intermediate returns every decade since, most notably in the 1970s in [[Season 12]], the 1980s with [[Season 21]], the 2010s with [[Series 6 (Doctor Who)|Series 6]] and [[Series 10 (Doctor Who)|10]] and the 2020s with [[Series 13 (Doctor Who)|''Flux'']]. |
||
| ⚫ | |||
| ⚫ | |||
| ⚫ | |||
| ⚫ | The story contains the first reference to what would become the Time Lords' [[non-interference policy]]. Although the Doctor never mentions it directly, he clearly shuns those who meddle with time. As in ''[[The Space Museum (TV story)|The Space Museum]]'', [[time]] is shown to be theoretically malleable, in contrast to the view of time presented in ''[[The Reign of Terror (TV story)|The Reign of Terror]]''. The concept of time would later be expounded upon to incorporate both elements in numerous later stories, including ''[[Attack of the Cybermen (TV story)|Attack of the Cybermen]]'' and ''[[The Waters of Mars (TV story)|The Waters of Mars]]''. |
||
| ⚫ | It is evident that |
||
| ⚫ | It is evident that the story was produced in the 1960s: all the Monk's possessions (apart from an "atomic cannon" and its ammunition) are contemporary with that era, and he refers to [[The Doctor's TARDIS|the TARDIS]] as a "modern" [[police box]]. Only his [[gramophone]] is old-fashioned, and it was intended to be a tape recorder in the script. |
||
| ⚫ | Only two months after his last absence, Hartnell took another holiday, and so does not feature in |
||
| + | |||
| ⚫ | Only two months after his last absence, Hartnell took another holiday, and so does not feature in the second episode, "The Meddling Monk". The story's historical setting had a particular relevance in 1965 as the 900th anniversary of the [[Battle of Hastings]] was only a year away. Production constraints meant ''Doctor Who'' could not satisfactorily feature the battle, but nor could it be fully ignored, hence the period was taken for the setting. (''[[About Time 1]]'') |
||
== Synopsis == |
== Synopsis == |
||
| Line 44: | Line 47: | ||
{{dab page|The Watcher}} |
{{dab page|The Watcher}} |
||
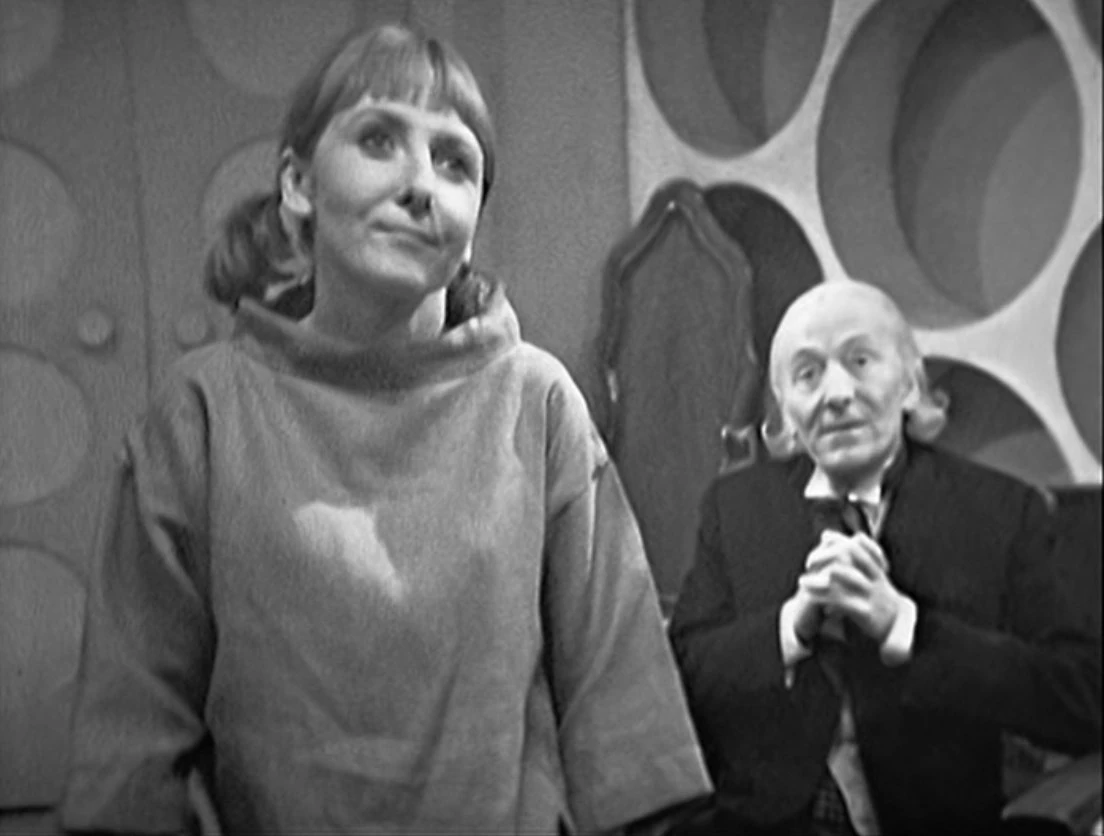
[[File:Vicki and the Doctor in TARDIS Time Meddler.jpg|thumb|Reminiscing with the Doctor.]] |
[[File:Vicki and the Doctor in TARDIS Time Meddler.jpg|thumb|Reminiscing with the Doctor.]] |
||
| − | A bored Vicki is moping around the TARDIS, clearly missing the company of Ian and Barbara. The Doctor offers to take Vicki back home if she is so unhappy, given he never really gave her much of a choice when they left [[Dido]]. This conversation is interrupted by a sound coming from the TARDIS' living quarters. Convinced it is a [[Dalek]], the Doctor and Vicki prepare themselves for an attack. However, instead of a Dalek, a human form is revealed to the travellers — Steven Taylor, who collapses to the ground. |
+ | A bored Vicki is moping around the TARDIS, clearly missing the company of Ian and Barbara. The Doctor offers to take Vicki back home if she is so unhappy, given he never really gave her much of a choice when they left [[Dido]] but Vicki admits she has nothing to go back to, since the death of her [[Newton Pallister|father]]. This conversation is interrupted by a sound coming from the TARDIS's living quarters. Convinced it is a surviving [[Dalek]] that has somehow got into the TARDIS, the Doctor and Vicki prepare themselves for an attack. However, instead of a Dalek, a human form is revealed to the travellers — Steven Taylor, who collapses to the ground. |
As he is discovered, the TARDIS materialises on a rocky shoreline. From atop a cliff, a monk looks down at the time machine, clearly paying it a lot of attention. |
As he is discovered, the TARDIS materialises on a rocky shoreline. From atop a cliff, a monk looks down at the time machine, clearly paying it a lot of attention. |
||
| Line 52: | Line 55: | ||
In the outside world two humans, dressed in tunics and living in primitive, tent-like structures, are interrupted when another of their party comes to inform them that a box has landed on the beach — thinking it washed up from a shipwreck. The two men go to explore it. |
In the outside world two humans, dressed in tunics and living in primitive, tent-like structures, are interrupted when another of their party comes to inform them that a box has landed on the beach — thinking it washed up from a shipwreck. The two men go to explore it. |
||
| − | The travellers have disembarked the TARDIS and are exploring their surroundings. Vicki discovers a Viking helmet that the Doctor dates to the tenth or eleventh century. He suspects this is where they have found themselves. Steven remains sceptical, saying that the helmet may have been left there as |
+ | The travellers have disembarked from the TARDIS and are exploring their surroundings. Vicki discovers a Viking helmet that the Doctor dates to the tenth or eleventh century. He suspects this is where they have found themselves. Steven remains sceptical, saying that the helmet may have been left there as a child's plaything. The Doctor and his friends decide to go exploring. The Doctor goes off alone, leaving Vicki and Steven to make their own way. As the travellers go along, the Monk sneaks from behind a rock and inspects the outside of the TARDIS, trying the door before moving on. He makes his way up the cliff and towards a monastery. Contemplatively, he enters and locks the door behind him. Soon singing starts. |
The two men who have gone to look for the TARDIS are disappointed to discover the ship is no longer there due to the high tide. They speculate that the waves have dashed the ship against the rocks. |
The two men who have gone to look for the TARDIS are disappointed to discover the ship is no longer there due to the high tide. They speculate that the waves have dashed the ship against the rocks. |
||
| Line 63: | Line 66: | ||
==== The Meddling Monk (2) ==== |
==== The Meddling Monk (2) ==== |
||
| − | [[The Monk]] makes the Doctor breakfast of toast and eggs and bacon with his toaster and electric griddle respectively. He goes to the Doctor's cell and offers it to him, but his prisoner petulantly rejects it — throwing what appears to be the contents of a washbasin through the viewing hatch in the door straight into the Monk's face. |
+ | [[First Monk|The Monk]] makes the Doctor breakfast of [[toast]] and [[Egg|eggs]] and [[bacon]] with his [[toaster]] and [[electric griddle]] respectively. He goes to the Doctor's cell and offers it to him, but his prisoner petulantly rejects it — throwing what appears to be the contents of a washbasin through the viewing hatch in the door straight into the Monk's face. |
Steven and Vicki have spent the night in a clearing. As Steven goes to fetch breakfast, leaving Vicki asleep, the two men who went in search of the TARDIS the previous day stumble across her. Vicki awakes before they can do anything. However, as Steven returns and the two make their way back to the TARDIS, the two friends are ambushed and taken back to the village. |
Steven and Vicki have spent the night in a clearing. As Steven goes to fetch breakfast, leaving Vicki asleep, the two men who went in search of the TARDIS the previous day stumble across her. Vicki awakes before they can do anything. However, as Steven returns and the two make their way back to the TARDIS, the two friends are ambushed and taken back to the village. |
||
| Line 69: | Line 72: | ||
Elsewhere, the Monk is given food by women of the village, which he accepts gratefully. He goes off to wait on the cliff side. Soon, he sees a Viking longboat loom over the horizon, which delights him. |
Elsewhere, the Monk is given food by women of the village, which he accepts gratefully. He goes off to wait on the cliff side. Soon, he sees a Viking longboat loom over the horizon, which delights him. |
||
| − | When Steven and Vicki are taken to the Saxon village, an argument breaks out between the two men. They are [[Wulnoth]] and [[Eldred (The Time Meddler)|Eldred]]. Wulnoth is the headman of the village and wants to let the travellers go, whilst Eldred is convinced they are spies for the Vikings and should be kept. After a vociferous argument, Wulnorth's wife, Edith, the woman with whom the Doctor spoke the previous night, intervenes. Eventually, it is decided the travellers may leave. Edith gives Vicki provisions for the trip and says the last she saw of the Doctor, he was heading off to explore the monastery. Vicki and Steven head off to join him. |
+ | When Steven and Vicki are taken to the Saxon village, an argument breaks out between the two men. They are [[Wulnoth]] and [[Eldred (The Time Meddler)|Eldred]]. Wulnoth is the headman of the village and wants to let the travellers go, whilst Eldred is convinced they are spies for the Vikings and should be kept. After a vociferous argument, Wulnorth's wife, [[Edith (The Time Meddler)|Edith]], the woman with whom the Doctor spoke the previous night, intervenes. Eventually, it is decided the travellers may leave. Edith gives Vicki provisions for the trip and says the last she saw of the Doctor, he was heading off to explore the monastery. Vicki and Steven head off to join him. |
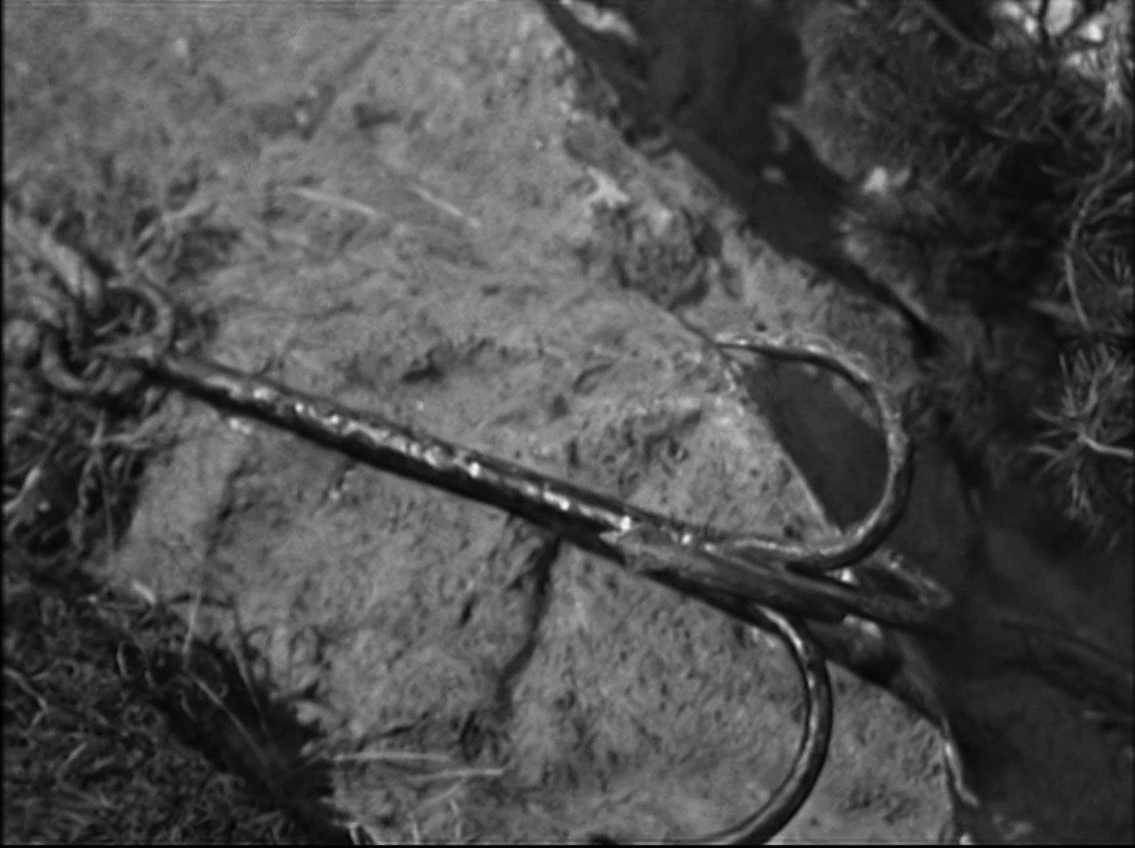
[[File:Viking grappling hook.jpg|thumb|The Vikings' grappling hook as they arrive.]] |
[[File:Viking grappling hook.jpg|thumb|The Vikings' grappling hook as they arrive.]] |
||
| Line 113: | Line 116: | ||
Back at the monastery, Sven looks into the Doctor's cell and sees the door to the secret passage open. He runs in to investigate, only for the Doctor to emerge from behind the door and knock him unconscious. By this time the Monk has returned. He gloats to Ulf about how the beacons are to be lit and all he has to do is deal with the Doctor and his plan will come to fruition. The Monk turns to find the Doctor behind him with Sven's sword. This time he demands answers. |
Back at the monastery, Sven looks into the Doctor's cell and sees the door to the secret passage open. He runs in to investigate, only for the Doctor to emerge from behind the door and knock him unconscious. By this time the Monk has returned. He gloats to Ulf about how the beacons are to be lit and all he has to do is deal with the Doctor and his plan will come to fruition. The Monk turns to find the Doctor behind him with Sven's sword. This time he demands answers. |
||
| − | Elsewhere in the monastery, Steven and Vicki look for the Doctor. They find a power cable emerging from a sarcophagus. They find doors in the side of the sarcophagus and open them. This leads to a TARDIS — the Monk's TARDIS. |
+ | Elsewhere in the monastery, Steven and Vicki look for the Doctor. They find a power cable emerging from a sarcophagus. They find doors in the side of the sarcophagus and open them. This leads to a TARDIS — [[the Monk's TARDIS]]. |
==== Checkmate (4) ==== |
==== Checkmate (4) ==== |
||
| Line 119: | Line 122: | ||
[[File:Vicki and Steven Monks TARDIS weapons.jpg|thumb|Vicki and Steven discovering the Monk's secrets within his TARDIS.]] |
[[File:Vicki and Steven Monks TARDIS weapons.jpg|thumb|Vicki and Steven discovering the Monk's secrets within his TARDIS.]] |
||
| − | Steven and Vicki have discovered a wealth of historical artefacts in the Monk's TARDIS and a journal. It records his meeting with [[Leonardo da Vinci]] to discuss powered flight and using time travel to collect a fortune in compound interest from a bank. They also find a crate of bazookas for the atomic cannons. |
+ | Steven and Vicki have discovered a wealth of historical artefacts in the Monk's TARDIS and a journal. It records his meeting with [[Leonardo da Vinci]] to discuss powered flight, and using time travel to collect a fortune in compound interest from £200 deposited in a bank in [[1968]]. They also find a crate of bazookas for the atomic cannons. |
Sven has regained consciousness after his attack by the Doctor. He goes in search of Ulf. Eldred spots them and runs off to warn the Saxon village that Vikings are in Britain. |
Sven has regained consciousness after his attack by the Doctor. He goes in search of Ulf. Eldred spots them and runs off to warn the Saxon village that Vikings are in Britain. |
||
| Line 131: | Line 134: | ||
As they run through the woods, the Monk leads Ulf and Sven to a dead end. The Vikings are captured by a group of spear-wielding Saxons, who are led by Wulnoth; he has the pair killed in retaliation for their attack on Edith. The Monk escapes towards the monastery. |
As they run through the woods, the Monk leads Ulf and Sven to a dead end. The Vikings are captured by a group of spear-wielding Saxons, who are led by Wulnoth; he has the pair killed in retaliation for their attack on Edith. The Monk escapes towards the monastery. |
||
| − | Meanwhile, back in the Monk's TARDIS, the Doctor is tampering with the control panel. He carefully ties some string around a device which he eventually yanks on after leaving the |
+ | Meanwhile, back in the Monk's TARDIS, the Doctor is tampering with the control panel. He carefully ties some string around a device which he eventually yanks on after leaving the craft. He gives this to Steven and leaves a note for the Monk. The Doctor and his companions head back to their own TARDIS. |
| − | The Monk returns to the monastery and finds the letter. The Doctor has written to say that he is sorry he couldn't stay to say goodbye, but he suspects the Monk will be busy for the foreseeable future and explains he has taken necessary steps in order to stop any more time meddling, before concluding that |
+ | The Monk returns to the monastery and finds the letter. The Doctor has written to say that he is sorry he couldn't stay to say goodbye, but he suspects the Monk will be busy for the foreseeable future and explains he has taken necessary steps in order to stop any more time meddling, before concluding that maybe one day he will return to free the Monk when he has learnt his lesson. |
| − | The Monk is initially scornful, believing his more modern TARDIS is not susceptible to damage. However, when he tries to |
+ | The Monk is initially scornful, believing his more modern TARDIS is not susceptible to damage. However, when he tries to enter, he finds the Doctor has removed the [[dimensional control]] — the device that lets the TARDIS be bigger on the inside — and has caused the control room to shrink in size to match the outside; there is no way the Monk can get inside. The Monk realises he is marooned in 1066 and shouts out in anger that his TARDIS is ruined, before slumping down forlornly on some stairs. |
== Cast == |
== Cast == |
||
| Line 141: | Line 144: | ||
* [[Vicki Pallister|Vicki]] - [[Maureen O'Brien]] |
* [[Vicki Pallister|Vicki]] - [[Maureen O'Brien]] |
||
* [[Steven Taylor|Steven]] - [[Peter Purves]] |
* [[Steven Taylor|Steven]] - [[Peter Purves]] |
||
| − | * |
+ | * [[First Monk|Monk]] - [[Peter Butterworth]] |
* [[Edith (The Time Meddler)|Edith]] - [[Alethea Charlton]] |
* [[Edith (The Time Meddler)|Edith]] - [[Alethea Charlton]] |
||
* [[Eldred (The Time Meddler)|Eldred]] - [[Peter Russell (actor)|Peter Russell]] |
* [[Eldred (The Time Meddler)|Eldred]] - [[Peter Russell (actor)|Peter Russell]] |
||
| Line 162: | Line 165: | ||
* [[Designer (crew)|Designer]] - [[Barry Newbury]] |
* [[Designer (crew)|Designer]] - [[Barry Newbury]] |
||
* [[Producer]] - [[Verity Lambert]] |
* [[Producer]] - [[Verity Lambert]] |
||
| − | * [[Director]] - [[Douglas Camfield]] |
+ | * [[Director (crew)|Director]] - [[Douglas Camfield]] |
* [[Fight Arranger]] - [[David Anderson]] |
* [[Fight Arranger]] - [[David Anderson]] |
||
* [[Percussion]] - [[Charles Botterill]] |
* [[Percussion]] - [[Charles Botterill]] |
||
| Line 169: | Line 172: | ||
* [[Studio lighting|Lighting]] - [[Ralph Walton]] |
* [[Studio lighting|Lighting]] - [[Ralph Walton]] |
||
* [[Studio sound|Sound]] - [[Ray Angel]] |
* [[Studio sound|Sound]] - [[Ray Angel]] |
||
| − | * [[Title Music]] - [[Ron Grainer]] |
||
=== Uncredited crew === |
=== Uncredited crew === |
||
| ⚫ | |||
| + | * [[Bookings]] - [[Pauline Mansfield-Clark]] ([[INFO]]: ''The Time Meddler'') |
||
| + | * [[Director's assistant|Director's Assistant]] - [[Cordelia Crawshaw]] ([[INFO]]: ''The Time Meddler'') |
||
| + | * [[Film Editor]] - [[Norman Matthews]] ([[INFO]]: ''The Time Meddler'') |
||
| + | * [[Grams operator|Grams Operator]] - [[Chris Carne]] ([[INFO]]: ''The Time Meddler'') |
||
* [[Make-up]] - [[Monica Ludkin]] |
* [[Make-up]] - [[Monica Ludkin]] |
||
| ⚫ | |||
| ⚫ | |||
| + | * [[Production Secretary]] - [[Valerie Speyer]] ([[INFO]]: ''The Time Meddler'') |
||
| ⚫ | |||
| ⚫ | |||
* [[Special Sounds]] - [[Brian Hodgson]]<ref>[http://www.bbc.co.uk/doctorwho/classic/episodeguide/timemeddler/detail.shtml BBC Official Site]</ref> |
* [[Special Sounds]] - [[Brian Hodgson]]<ref>[http://www.bbc.co.uk/doctorwho/classic/episodeguide/timemeddler/detail.shtml BBC Official Site]</ref> |
||
| ⚫ | |||
| + | * [[Technical manager|Technical Manager]] - [[Bernard Fox]] ([[INFO]]: ''The Time Meddler'') |
||
* [[Theme Arrangement]] - [[Delia Derbyshire]] ([[INFO]]: "[[The Forest of Fear]]") |
* [[Theme Arrangement]] - [[Delia Derbyshire]] ([[INFO]]: "[[The Forest of Fear]]") |
||
| + | * [[Vision Mixer]]s - [[John Lopes]], [[Dave Hanks]] ([[INFO]]: ''The Time Meddler'') |
||
| − | == |
+ | == Worldbuilding == |
| + | === Foods and beverages === |
||
| − | * Steven picks [[Blackberry|blackberries]] for breakfast. |
+ | * Steven picks [[Blackberry|blackberries]] for [[breakfast]]. |
| + | * The Doctor drinks [[mead]] from a [[horn]]. |
||
=== History and time travel === |
=== History and time travel === |
||
* The Monk claims to have helped the building of [[Stonehenge]] with an [[anti-gravity|antigravitional]] lift. |
* The Monk claims to have helped the building of [[Stonehenge]] with an [[anti-gravity|antigravitional]] lift. |
||
* The Doctor cites the "[[Non-interference policy|golden rule]] about the space and time travelling: never, never interfere with the course of history". |
* The Doctor cites the "[[Non-interference policy|golden rule]] about the space and time travelling: never, never interfere with the course of history". |
||
| − | * The Monk plans to provide humanity with science and technology years ahead of their time after he's completed his plan to destroy the Viking fleet; he plans to give [[William Shakespeare|Shakespeare]] the chance to see his play [[Hamlet]] on [[television]], and to give humanity jet |
+ | * The Monk plans to provide humanity with science and technology years ahead of their time after he's completed his plan to destroy the Viking fleet; he plans to give [[William Shakespeare|Shakespeare]] the chance to see his play ''[[Hamlet]]'' on [[television]], and to give humanity jet airliners by [[1320]] after giving them enough knowledge to make it happen. |
== Story notes == |
== Story notes == |
||
| − | * This is the first story in which the acronym TARDIS is said to stand for "Time and Relative Dimensions in Space", slightly different than the singular "Dimension" as was said in ''[[An Unearthly Child (TV story)|An Unearthly Child]]''. This was an error made by Maureen O'Brien during recording and was retained through much of the series' history. |
+ | * This is the first story in which the acronym TARDIS is said to stand for "Time and Relative Dimensions in Space", slightly different than the singular "Dimension" as was said in ''[[An Unearthly Child (TV story)|An Unearthly Child]]''. This was an error made by [[Maureen O'Brien]] during recording and was retained through much of the series' history. |
| − | * All episodes exist as [[16mm telerecordings|16mm black & white film telerecordings]], though a |
+ | * All episodes exist as [[16mm telerecordings|16mm black & white film telerecordings]], though "Checkmate" is still missing a 12-second sequence showing the Vikings Ulf and Sven being stabbed to death by Wulnoth and the Saxons; no complete copy of the episode is known to exist. The audio portion of this sequence survives from an off-air recording and is included on the DVD release as a special feature. |
* [[Peter Purves]] is credited as "Steven Taylor" for "The Watcher", and as "Steven" for "The Meddling Monk" to "Checkmate". |
* [[Peter Purves]] is credited as "Steven Taylor" for "The Watcher", and as "Steven" for "The Meddling Monk" to "Checkmate". |
||
| − | * [[William Hartnell]] was on holiday for the week |
+ | * [[William Hartnell]] was on holiday for the week "The Meddling Monk" was recorded, and so the Doctor's appearance is limited to the reprise and heard only as a pre-recorded voice-over. |
* A print of the episode "The Meddling Monk" is held in the Film & TV Library. Incomplete prints of all episodes were found in [[Nigeria]] in 1985. Complete prints of "The Watcher" and "A Battle of Wits" were returned to the archive in 1992. |
* A print of the episode "The Meddling Monk" is held in the Film & TV Library. Incomplete prints of all episodes were found in [[Nigeria]] in 1985. Complete prints of "The Watcher" and "A Battle of Wits" were returned to the archive in 1992. |
||
* [[Tele-snaps]] for this story are held by a private collector. |
* [[Tele-snaps]] for this story are held by a private collector. |
||
* No "Next Episode" caption is present on "Checkmate", making it the first episode not to do so. Instead, an extended version of the theme music is heard as images of the three lead actors appear on-screen in front of a space backdrop. This differs from the final serial of the last season, ''[[The Reign of Terror (TV story)|The Reign of Terror]]'', which provided a caption for the first episode of ''[[Planet of Giants (TV story)|Planet of Giants]]''. |
* No "Next Episode" caption is present on "Checkmate", making it the first episode not to do so. Instead, an extended version of the theme music is heard as images of the three lead actors appear on-screen in front of a space backdrop. This differs from the final serial of the last season, ''[[The Reign of Terror (TV story)|The Reign of Terror]]'', which provided a caption for the first episode of ''[[Planet of Giants (TV story)|Planet of Giants]]''. |
||
| − | * Some versions of this story, especially those distributed in the |
+ | * Some versions of this story, especially those distributed in the U.S. during the 1980s, cut the sequence in "The Watcher" where the Doctor and Vicki discover Steven hiding in the TARDIS. |
* This story was chosen by fans to represent the [[William Hartnell]] era by fans to be rebroadcast for ''[[Doctor Who @40]]''. |
* This story was chosen by fans to represent the [[William Hartnell]] era by fans to be rebroadcast for ''[[Doctor Who @40]]''. |
||
* Footage of the Viking ship was taken from a BBC Newsreel item about a Viking recreation on the south coast of England. In the remastered DVD version this footage is restored from the original 35mm film recording; the picture quality of this restoration reportedly appeared too good compared to the restored videotape and 16mm location footage, leading the restoration team to digitally add grain and soften the image to make it better resemble the rest of the episode. The complete item can be found on the DVD release as an extra. |
* Footage of the Viking ship was taken from a BBC Newsreel item about a Viking recreation on the south coast of England. In the remastered DVD version this footage is restored from the original 35mm film recording; the picture quality of this restoration reportedly appeared too good compared to the restored videotape and 16mm location footage, leading the restoration team to digitally add grain and soften the image to make it better resemble the rest of the episode. The complete item can be found on the DVD release as an extra. |
||
| − | * This was Douglas Camfield's last four-part story until ''[[Terror of the Zygons (TV story)|Terror of the Zygons]]'' over a decade later. |
+ | * This was [[Douglas Camfield]]'s last four-part story until ''[[Terror of the Zygons (TV story)|Terror of the Zygons]]'' over a decade later. |
| + | * The interior of the Monk's TARDIS is actually the set of the Doctor's, albeit slightly redressed — i.e. with the control console standing on a raised platform. |
||
| + | * According to [[Donald Tosh]], the Doctor addressing the camera and mentioning [[William the Conqueror]]'s future arrival was ad-libbed by [[William Hartnell]]. "Of course none of this had been in the script. And we were all supposed to be ever so grateful! He had remembered vaguely what Dennis's dialogue was all about and thought that we'd be disappointed if he didn't manage to get the plot across. For some technical reason we weren't able to shoot it again so it had to stay in." |
||
| + | * During production of this story, new producer [[John Wiles]] began taking over production duties. [[William Hartnell]], displeased at the number of changes undergoing the production, play-acted throwing a temper tantrum during the rehearsal of this story. |
||
| + | * [[Peter Purves]] described the story as "a nice bit of nonsense". |
||
| + | * [[Douglas Camfield]] liked the comedy in the story as a contrast to the heaviness elsewhere in the season. |
||
| + | * Several characters were named after real people - Edith for one of Harold's sisters, Ulf for an earl and uncle to Harold, Sven from Harold's brother Sweyn, and Wulnoth derived from Harold's grandfather, Wulfnoth. |
||
| + | * William Hartnell became the only original cast member with this serial following the departure of [[William Russell]] and [[Jacqueline Hill]] in the previous story. |
||
=== Ratings === |
=== Ratings === |
||
| Line 212: | Line 230: | ||
* The Doctor and the Monk have never met before. ''(The Monk recognises the Doctor; however, the Doctor fails to recognise the Time Meddler at first. He later asks him, ''And what are you trying to get up to this time?''. The First Doctor failed to recognise the Master at first in ''[[The Five Doctors (TV story)|The Five Doctors]]'' as well.)'' |
* The Doctor and the Monk have never met before. ''(The Monk recognises the Doctor; however, the Doctor fails to recognise the Time Meddler at first. He later asks him, ''And what are you trying to get up to this time?''. The First Doctor failed to recognise the Master at first in ''[[The Five Doctors (TV story)|The Five Doctors]]'' as well.)'' |
||
* The Monk is fifty years younger than the Doctor ''or'' the Monk left Gallifrey fifty years after the Doctor. ''(The Doctor recognises the Monk's TARDIS as a Mark 4, and he later guesses, "I would say that I am fifty years earlier".)'' |
* The Monk is fifty years younger than the Doctor ''or'' the Monk left Gallifrey fifty years after the Doctor. ''(The Doctor recognises the Monk's TARDIS as a Mark 4, and he later guesses, "I would say that I am fifty years earlier".)'' |
||
| + | * In "The Meddling Monk", the Doctor throws his breakfast through the cell door's viewing hatch into the Monk's face. ''(The Monk is actually hit by a large amount of water, possibly the contents of a washbasin. The Doctor's throwing his breakfast at the Monk was added by [[Nigel Robinson]] for the [[The Time Meddler (novelisation)|novelisation]].)'' |
||
=== Filming locations === |
=== Filming locations === |
||
| Line 242: | Line 261: | ||
Contents: |
Contents: |
||
| ⚫ | |||
| − | * ''[[Verity Lambert Obituary]]'' - A concise essay looking back at the career of one of ''Doctor Who''{{'}}s co-creators. |
+ | * ''[[Verity Lambert Obituary]]'' - A concise essay looking back at the career of one of ''[[Doctor Who]]''{{'}}s co-creators. |
| − | * ''[[The Lost Twelve Seconds]]'' - A small part of |
+ | * ''[[The Lost Twelve Seconds]]'' - A small part of episode four is still missing, and this short item uses an off-air audio recording and an original script to place the missing 12 seconds in context |
| − | * ''[[ |
+ | * ''[[The Time Meddler Restoration: Before & After|Restoration]]'' - A featurette showing the techniques used in the restoration of this story |
| − | * ''[[Stripped for Action |
+ | * ''[[Stripped for Action: The First Doctor (documentary)|Stripped for Action - The First Doctor]]'' - A look back at the [[First Doctor]]'s colourful comic strip adventures. |
| − | * Verity Lambert Photo Gallery |
||
| + | * Verity Lambert Gallery - A collection of photographs of the trailblazing producer |
||
| − | * ''Radio Times'' Listing (PDF) |
||
| + | * ''[[Radio Times]]'' Billings - Original listings from ''Radio Times'' in PDF format (DVD-ROM PC/Mac) |
||
| ⚫ | |||
* Photo Gallery |
* Photo Gallery |
||
| ⚫ | |||
| ⚫ | |||
| + | * Coming Soon Trailer - ''[[The Five Doctors (TV story)|The Five Doctors: 25th Anniversary Edition]]'' |
||
Rear Credits: |
Rear Credits: |
||
| Line 264: | Line 284: | ||
TheTimeMeddlerDVD.jpg|Region 2 UK cover |
TheTimeMeddlerDVD.jpg|Region 2 UK cover |
||
The_Time_Meddler_AUS_DVD.jpg|Region 4 Australian cover |
The_Time_Meddler_AUS_DVD.jpg|Region 4 Australian cover |
||
| − | + | Meddler us.jpg|Region 1 US cover |
|
</gallery> |
</gallery> |
||
| + | |||
| + | === Blu-ray releases === |
||
| + | The story was released on Blu-ray in the UK on [[5 December (releases)|5 December]] [[2022 (releases)|2022]], as part of the box set ''[[The Collection]]: [[Season 2|Season Two]]''. |
||
=== Digital releases === |
=== Digital releases === |
||
| Line 282: | Line 305: | ||
<gallery position="center" captionalign="center" hideaddbutton="true"> |
<gallery position="center" captionalign="center" hideaddbutton="true"> |
||
| − | + | The Time Meddler UK VHS.jpg|The Time Meddler VHS UK Cover |
|
| − | + | The First Doctor UK VHS Box Set.jpg|The First Doctor VHS UK Box Set Cover |
|
The First Doctor Collection.jpg|The First Doctor VHS AUS Box Set Cover |
The First Doctor Collection.jpg|The First Doctor VHS AUS Box Set Cover |
||
| − | + | The Time Meddler US VHS.jpg|The Time Meddler VHS US Cover |
|
| − | + | The The End of the Universe US VHS Box Set.jpg|The End of the Universe VHS US Box Set Cover |
|
</gallery> |
</gallery> |
||
| Line 302: | Line 325: | ||
{{Monk stories}} |
{{Monk stories}} |
||
{{TitleSort}} |
{{TitleSort}} |
||
| + | |||
| ⚫ | |||
| ⚫ | |||
[[Category:Articles that were originally Wikipedia forks]] |
[[Category:Articles that were originally Wikipedia forks]] |
||
[[Category:Doctor Who (1963) television stories]] |
[[Category:Doctor Who (1963) television stories]] |
||
| Line 312: | Line 334: | ||
[[Category:Four part serials]] |
[[Category:Four part serials]] |
||
[[Category:The Monk stories]] |
[[Category:The Monk stories]] |
||
| + | [[Category:Rediscovered stories]] |
||
| + | [[Category:An Introduction To The First Doctor television stories]] |
||
| + | |||
| ⚫ | |||
| ⚫ | |||
| + | [[ru:Вмешивающийся во время]] |
||
| + | [[fr:The Time Meddler (TV)]] |
||
Latest revision as of 22:28, 12 April 2024
The Time Meddler was the ninth and final serial of season 2 of Doctor Who. This story was the first pseudo-historical: a historical story with science-fiction elements other than the presence of the regular characters and the TARDIS. (Although there were science-fiction elements mixed with historical facts in a portion of The Chase, this was the first full story to combine the two.)
It is also the first story to have only two companions - Steven and Vicki - a format that would become default for the rest of the First Doctor's era and most of the Second Doctor's, with intermediate returns every decade since, most notably in the 1970s in Season 12, the 1980s with Season 21, the 2010s with Series 6 and 10 and the 2020s with Flux.
The Monk was the first Time Lord other than the Doctor and Susan to appear in the series, although the aforementioned term would not be invented for another four years. The Monk also became the series' first recurring individual villain.
The story contains the first reference to what would become the Time Lords' non-interference policy. Although the Doctor never mentions it directly, he clearly shuns those who meddle with time. As in The Space Museum, time is shown to be theoretically malleable, in contrast to the view of time presented in The Reign of Terror. The concept of time would later be expounded upon to incorporate both elements in numerous later stories, including Attack of the Cybermen and The Waters of Mars.
It is evident that the story was produced in the 1960s: all the Monk's possessions (apart from an "atomic cannon" and its ammunition) are contemporary with that era, and he refers to the TARDIS as a "modern" police box. Only his gramophone is old-fashioned, and it was intended to be a tape recorder in the script.
Only two months after his last absence, Hartnell took another holiday, and so does not feature in the second episode, "The Meddling Monk". The story's historical setting had a particular relevance in 1965 as the 900th anniversary of the Battle of Hastings was only a year away. Production constraints meant Doctor Who could not satisfactorily feature the battle, but nor could it be fully ignored, hence the period was taken for the setting. (About Time 1)
Synopsis[]
The Doctor, Vicki, and new companion Steven Taylor arrive in Saxon Northumbria on the eve of the Viking and Norman invasions. It is 1066, a pivotal moment in British history. The hand of a mysterious Monk is at work in the nearby monastery, intending that history takes a different course.
Plot[]
The Watcher (1)[]
- You may wish to consult
The Watcherfor other, similarly-named pages.

Reminiscing with the Doctor.
A bored Vicki is moping around the TARDIS, clearly missing the company of Ian and Barbara. The Doctor offers to take Vicki back home if she is so unhappy, given he never really gave her much of a choice when they left Dido but Vicki admits she has nothing to go back to, since the death of her father. This conversation is interrupted by a sound coming from the TARDIS's living quarters. Convinced it is a surviving Dalek that has somehow got into the TARDIS, the Doctor and Vicki prepare themselves for an attack. However, instead of a Dalek, a human form is revealed to the travellers — Steven Taylor, who collapses to the ground.
As he is discovered, the TARDIS materialises on a rocky shoreline. From atop a cliff, a monk looks down at the time machine, clearly paying it a lot of attention.
Meanwhile, in the TARDIS, Vicki and the Doctor are helping Steven to recuperate. Steven explains that as the Mechonoid City collapsed, he escaped from the rubble and looked for the Doctor. He found his spaceship and collapsed in it before the Doctor and his companions left the planet. As Steven starts to feel more normal, Vicki begins to explain that the TARDIS is a time machine — Steven is far from convinced and brands the TARDIS an IDBI — "I Don't Believe It". The Doctor asks Steven to put his doubts to one side and suggests that Vicki show Steven where to get washed and changed so they may go and explore.
In the outside world two humans, dressed in tunics and living in primitive, tent-like structures, are interrupted when another of their party comes to inform them that a box has landed on the beach — thinking it washed up from a shipwreck. The two men go to explore it.
The travellers have disembarked from the TARDIS and are exploring their surroundings. Vicki discovers a Viking helmet that the Doctor dates to the tenth or eleventh century. He suspects this is where they have found themselves. Steven remains sceptical, saying that the helmet may have been left there as a child's plaything. The Doctor and his friends decide to go exploring. The Doctor goes off alone, leaving Vicki and Steven to make their own way. As the travellers go along, the Monk sneaks from behind a rock and inspects the outside of the TARDIS, trying the door before moving on. He makes his way up the cliff and towards a monastery. Contemplatively, he enters and locks the door behind him. Soon singing starts.
The two men who have gone to look for the TARDIS are disappointed to discover the ship is no longer there due to the high tide. They speculate that the waves have dashed the ship against the rocks.
Later on that day, the Doctor is exploring the area. He stumbles across the homestead of the couple who went to look for the TARDIS. As he snoops around, looking for clues of the time he has landed in, he turns to have a stick pushed against his throat, forcing him to be still. The stick belongs to the wife of the house. She apologises for her rough behaviour, saying that you can't be too careful with strangers. She soon becomes very hospitable, offering the Doctor mead and chatting with him. From their conversation, the Doctor learns it is the summer of 1066, just before the Viking invasion that preceded the Battle of Hastings. Whilst the woman is fetching more mead the singing, which has continued throughout the conversation, distorts and warps as if it is created by an inhuman voice. The Doctor cross-examines the woman, guessing that the monastery has only just come back into use and no one has seen any of the monks. With this information, he goes to explore the mysterious building.
Elsewhere, Steven and Vicki are interrupted in their explorations by another figure. They hide in the undergrowth, waiting for the man to disappear, but he bends and seems to inspect something very closely. Worried that it might be something of theirs, Steven confronts the man, which ends in a scuffle. Steven is hit and the man escapes. Steven has got what the man was looking at. It is a modern-day watch.
By this time the Doctor has found his way to the monastery. Little does he know he is expected by the monk, who unlocks the door for him. The Doctor moves through the building, following the singing. Finally, he finds the source of the noise — a gramophone attached to a large amplifying device. The Doctor stops the record, but before he goes any further, bars crash down, trapping him in the room. The monk makes his way towards the Doctor, laughing maniacally.
The Meddling Monk (2)[]
The Monk makes the Doctor breakfast of toast and eggs and bacon with his toaster and electric griddle respectively. He goes to the Doctor's cell and offers it to him, but his prisoner petulantly rejects it — throwing what appears to be the contents of a washbasin through the viewing hatch in the door straight into the Monk's face.
Steven and Vicki have spent the night in a clearing. As Steven goes to fetch breakfast, leaving Vicki asleep, the two men who went in search of the TARDIS the previous day stumble across her. Vicki awakes before they can do anything. However, as Steven returns and the two make their way back to the TARDIS, the two friends are ambushed and taken back to the village.
Elsewhere, the Monk is given food by women of the village, which he accepts gratefully. He goes off to wait on the cliff side. Soon, he sees a Viking longboat loom over the horizon, which delights him.
When Steven and Vicki are taken to the Saxon village, an argument breaks out between the two men. They are Wulnoth and Eldred. Wulnoth is the headman of the village and wants to let the travellers go, whilst Eldred is convinced they are spies for the Vikings and should be kept. After a vociferous argument, Wulnorth's wife, Edith, the woman with whom the Doctor spoke the previous night, intervenes. Eventually, it is decided the travellers may leave. Edith gives Vicki provisions for the trip and says the last she saw of the Doctor, he was heading off to explore the monastery. Vicki and Steven head off to join him.

The Vikings' grappling hook as they arrive.
By this time the Vikings have made their way to dry land. The leader gives orders to three others, Sven, Ulf and Gunnar the Giant, to survey the land and sack the first village they come to for provisions. The two men make their way into the wilderness.
Steven and Vicki have arrived at the monastery, only to be told by the Monk that he has seen no one out of the ordinary for the last few days. Steven presses him to go in and ask the other monks. While he is gone, Vicki and Steven become convinced the Monk is lying to them. They devise a plan to see if he really hasn't seen the Doctor. When the Monk reemerges to say the monks haven't seen him, Steven asks him to keep a lookout and "remember the description I gave you". When the Monk retorts with a description of the Doctor, Steven and Vicki know he is lying; they did not give any description to the Monk. They propose to break into the monastery that night to free the Doctor.
Late in the night, Wulnoth's village is sacked by the Vikings and Edith is wounded. When Wulnoth and Eldred return, they find her body. Eldred immediately suspects Steven and Vicki, but Edith struggles to say it was Vikings. Wulnoth and his men follow the Vikings' tracks and soon catch up with them. This leads to a mighty battle in which Eldred is wounded and Gunnar is killed. The two men make their way to the monastery for sanctuary.
While this is happening, Steven and Vicki break into the monastery and look for the Doctor. As they explore, they discover the Monk's gramophone and suspect something is awry. The Monk sees them and silently stalks them through the monastery until the arrival of Wulnoth and Eldred at his door soon distracts him. He goes to let them in. As he does, Steven and Vicki arrive at the cell door and break in — only to find the Doctor gone, replaced with blankets to make it look like he is sleeping.
A Battle of Wits (3)[]
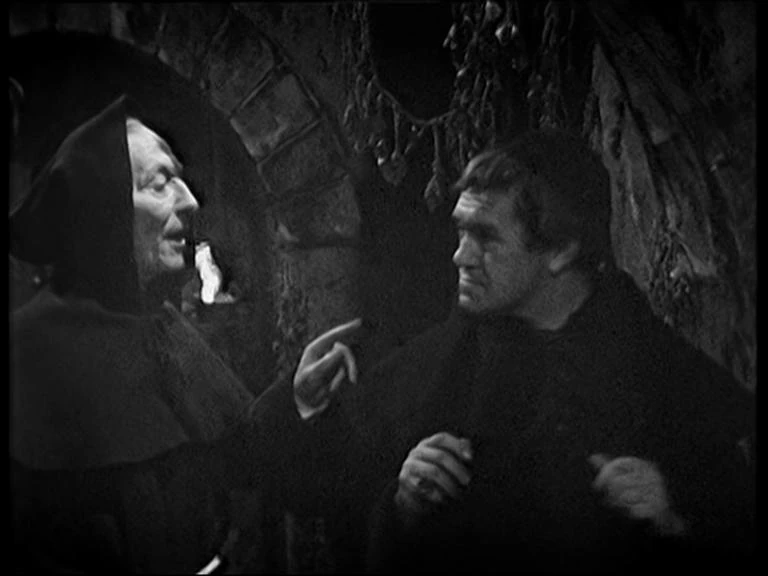

"And remember, no more monkery!"
Investigating how the Doctor might have disappeared, Steven and Vicki find a secret passage. They decide the Doctor has used it and elect to follow it. As they leave the cell, the Monk comes to check on the Doctor, only to find the door open and the secret passage breached. Before he has any time to explore further, he is called to the aid of the two Saxons.
After his escape, the Doctor has found his way back to the Saxon village and the company of Edith. She tells him where his friends are. She also informs him of the Vikings' arrival. The Doctor decides the Monk and the Vikings must be linked somehow and he must face the Monk again. He reassures Edith that this is not the main invasion; he has knowledge of the Vikings from "the places I have visited". He is aware that they arrive at the Humber and are defeated, but as he leaves he says it is possible that the Monk's presence might affect this.
Meanwhile, Steven and Vicki have emerged from the tunnel and cannot find the Doctor. They decide to go back to the TARDIS, hoping he has done likewise.
At the monastery, the Monk uses his knowledge of modern medicine to nurse Eldred back to health. Wulnoth insists that Eldred stays with the Monk until he is well. Reluctant to blow his cover, the Monk consents. In conversation with Eldred, the Monk learns that from the looks of the Vikings the Saxons encountered, a full invasion may occur within three days. The Monk seems happy at this news, saying he is on schedule.
Lurking in the undergrowth, the two remaining Vikings, Sven and Ulf, plan their next move. Sven is keen to continue with the mission and report back to their group. Ulf insists that the best thing to do is hide because they are vastly outnumbered by Saxons. At first, Sven is hostile to this plan. He calls Ulf a coward and threatens to kill him, but soon he relents. They decide on the monastery as the safest place for sanctuary and head towards the building.
In the solace of the monastery the Monk pores over a plan that reads:
- Arrival in Northumbria
- Position atomic cannon
- Sight Vikings
- Light beacon fires
- Destroy Viking fleet
- Norman landing
- Battle of Hastings
- Meet King Harold.
Points 1 to 3 are ticked on this plan, and the Monk ruminates that he must turn to the fourth point shortly. He is interrupted in his scheming by frantic knocking at the door. The Monk answers it only to find no one. As soon as the door is closed, the knocking resumes. Bemused, he goes out to explore, only to be met by the Doctor. The Doctor points a stick in the Monk's back, saying it is a rifle and he has come for answers. He leads a docile Monk into the monastery.
Steven and Vicki arrive at the cliff edge, above where the TARDIS materialised. There is nothing but the sea below. Vicki is left with two options: the TARDIS has been swept off to sea or the Doctor returned to it and left them behind. Steven suggests that they go back to the monastery to seek sanctuary and see if the Doctor is still there. As they make their way back, they come across the Monk's atomic cannon pointing out to sea. Seeing this as yet another sign of the Monk's curious place in history, they hurry back to the monastery to put a stop to whatever it is the man is up to. They sneak back in through the secret passage.
Before the Doctor can interrogate the Monk, they are interrupted by more banging at the door. To avoid the Monk using the Doctor's more modern dress as a way of turning the visitors against him, he demands the Monk give him a spare Monk's cassock before they answer the door. The Monk relents. This plan backfires when the Doctor, now adorned in the garb of a monk, opens the door to the Vikings. They immediately take the Doctor hostage — their plan is to threaten the other monks to hide them away by threatening the "chief monk's" life.
In the confusion, the Monk slips away. The Doctor is put back in his original cell, where he is guarded by Sven whilst Ulf goes out to look for the other monks. The Monk sneaks up on Ulf and knocks him unconscious and ties him up. He then slips out of the monastery to visit the Saxon village. There he speaks to Wulnoth and informs him he is expecting a boat to arrive shortly with provisions for the monastery. He asks the village's support in setting the fires on the cliff and keeping them lit. Wulnoth agrees, but when the Monk leaves, Edith and he say it may have to do with the Viking invasion of which the Doctor spoke.
Back at the monastery, Sven looks into the Doctor's cell and sees the door to the secret passage open. He runs in to investigate, only for the Doctor to emerge from behind the door and knock him unconscious. By this time the Monk has returned. He gloats to Ulf about how the beacons are to be lit and all he has to do is deal with the Doctor and his plan will come to fruition. The Monk turns to find the Doctor behind him with Sven's sword. This time he demands answers.
Elsewhere in the monastery, Steven and Vicki look for the Doctor. They find a power cable emerging from a sarcophagus. They find doors in the side of the sarcophagus and open them. This leads to a TARDIS — the Monk's TARDIS.
Checkmate (4)[]
As Steven and Vicki search the Monk's TARDIS (the control room of which is identical to that of the Doctor's TARDIS, except the control console stands on a raised platform), the Doctor interrogates the Monk on his intentions in 1066. The Monk admits his plan is to destroy the Vikings to allow Harald Godwinson to take the throne. He believes this will aid humankind. The Monk tries to convince the Doctor that what he is doing is altruistic, but the Doctor refuses to agree and orders the Monk show him his TARDIS.
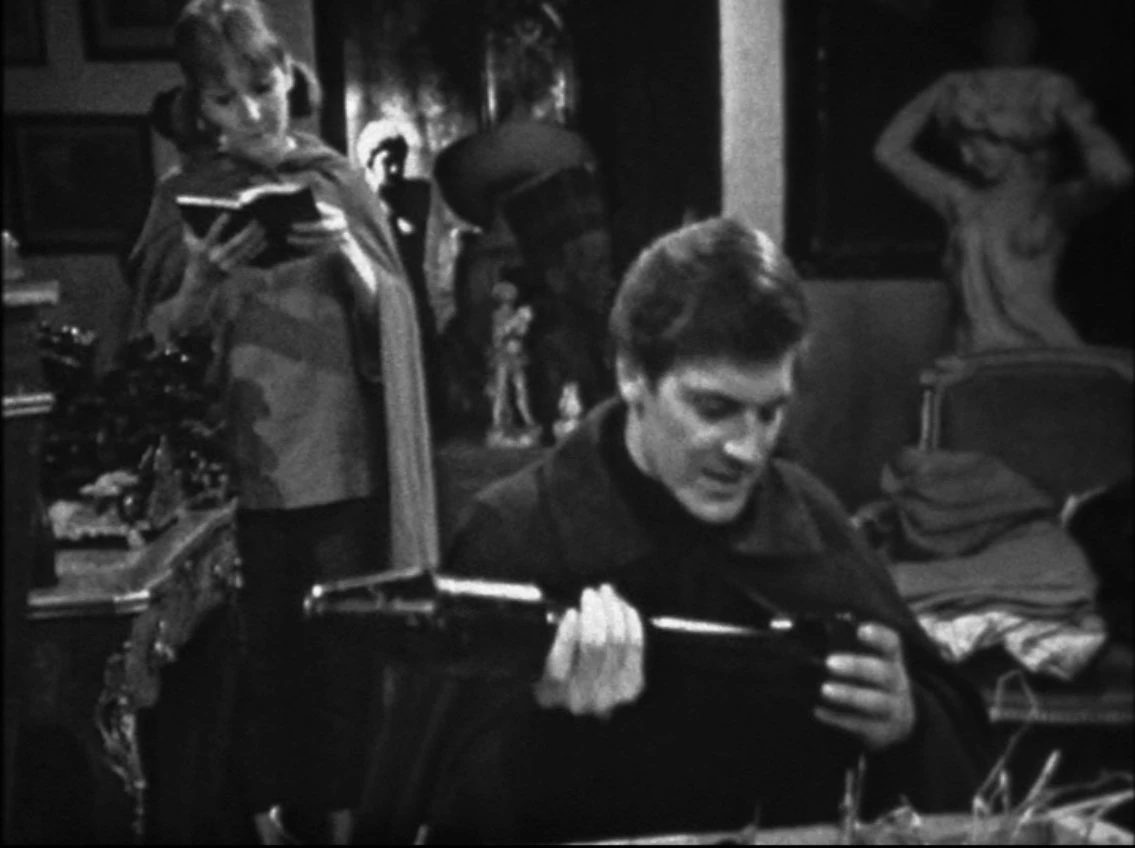

Vicki and Steven discovering the Monk's secrets within his TARDIS.
Steven and Vicki have discovered a wealth of historical artefacts in the Monk's TARDIS and a journal. It records his meeting with Leonardo da Vinci to discuss powered flight, and using time travel to collect a fortune in compound interest from £200 deposited in a bank in 1968. They also find a crate of bazookas for the atomic cannons.
Sven has regained consciousness after his attack by the Doctor. He goes in search of Ulf. Eldred spots them and runs off to warn the Saxon village that Vikings are in Britain.
By this time, the Doctor and the Monk have reached the Monk's TARDIS. They compare machines. The Doctor is critical of the Monk's TARDIS, even though his camouflage unit is functional and the machine is a newer model. The Doctor assumes the Monk is from the same planet as he is, but about fifty years in the future. As they enter the machine, the Doctor is reunited with his companions. The companions break the news to the Doctor that their TARDIS has been washed away by the tide, but he assures them the tide will have no effect on the ship's position. While they talk, the Monk escapes. Steven and Vicki chase after him, but the Monk has run straight into the Vikings. Thinking quickly, the Monk blames the Doctor, Vicki and Steven for the Vikings' mistreatment and the Vikings tie them up lest they cause more trouble.
Back at the Saxon village, Wulnoth and Edith are holding a meeting of the Saxons. They suspect the Monk is a Viking spy. The meeting is gate-crashed by Eldred, who relates what he saw at the monastery. This confirms the Saxons' suspicions and they head for the monastery.
Whilst Steven and Vicki try to get their heads around the details of time travel, the Monk is using the unwitting Vikings to sink their own ships. He claims the bazookas are charms to help the Viking ships sail to clear waters. They help the Monk carry these to the ship, but are interrupted by the horde of Saxons. The Vikings and the Monk escape, pursued by the Saxons. Edith stays behind to free the Doctor and his companions. She invites them back to the village for a celebration. The Doctor says they will attend, but he has a few matters to clear up at the monastery first.
As they run through the woods, the Monk leads Ulf and Sven to a dead end. The Vikings are captured by a group of spear-wielding Saxons, who are led by Wulnoth; he has the pair killed in retaliation for their attack on Edith. The Monk escapes towards the monastery.
Meanwhile, back in the Monk's TARDIS, the Doctor is tampering with the control panel. He carefully ties some string around a device which he eventually yanks on after leaving the craft. He gives this to Steven and leaves a note for the Monk. The Doctor and his companions head back to their own TARDIS.
The Monk returns to the monastery and finds the letter. The Doctor has written to say that he is sorry he couldn't stay to say goodbye, but he suspects the Monk will be busy for the foreseeable future and explains he has taken necessary steps in order to stop any more time meddling, before concluding that maybe one day he will return to free the Monk when he has learnt his lesson.
The Monk is initially scornful, believing his more modern TARDIS is not susceptible to damage. However, when he tries to enter, he finds the Doctor has removed the dimensional control — the device that lets the TARDIS be bigger on the inside — and has caused the control room to shrink in size to match the outside; there is no way the Monk can get inside. The Monk realises he is marooned in 1066 and shouts out in anger that his TARDIS is ruined, before slumping down forlornly on some stairs.
Cast[]
- Dr. Who - William Hartnell
- Vicki - Maureen O'Brien
- Steven - Peter Purves
- Monk - Peter Butterworth
- Edith - Alethea Charlton
- Eldred - Peter Russell
- Wulnoth - Michael Miller
- Saxon Hunter - Michael Guest
- Ulf - Norman Hartley
- Viking Leader - Geoffrey Cheshire
- Sven - David Anderson
- Gunnar the Giant - Ronald Rich
Uncredited cast[]
- Viking - James Hamilton
- Stuntmen/Saxons - Tim Condren, Fred Haggerty
- Saxon Villagers - Ken McGarvie, Derek Chafer, Dougie Dean, Freddy Parsons, Vic Taylor, John Evans, Donald Simons, Lyn Turner (DWM 307)
Crew[]
- Writer - Dennis Spooner
- Title Music - Ron Grainer and the BBC Radiophonic Workshop
- Story Editor - Donald Tosh
- Designer - Barry Newbury
- Producer - Verity Lambert
- Director - Douglas Camfield
- Fight Arranger - David Anderson
- Percussion - Charles Botterill
- Costumes - Daphne Dare
- Make-up - Sonia Markham
- Lighting - Ralph Walton
- Sound - Ray Angel
Uncredited crew[]
- Assistant Floor Manager - Gillian Chardet (INFO: The Time Meddler)
- Bookings - Pauline Mansfield-Clark (INFO: The Time Meddler)
- Director's Assistant - Cordelia Crawshaw (INFO: The Time Meddler)
- Film Editor - Norman Matthews (INFO: The Time Meddler)
- Grams Operator - Chris Carne (INFO: The Time Meddler)
- Make-up - Monica Ludkin
- Production Assistant - David Maloney (INFO: The Time Meddler)
- Production Secretary - Valerie Speyer (INFO: The Time Meddler)
- Special Sounds - Brian Hodgson[1]
- Studio Sound - Brian Hiles
- Technical Manager - Bernard Fox (INFO: The Time Meddler)
- Theme Arrangement - Delia Derbyshire (INFO: "The Forest of Fear")
- Vision Mixers - John Lopes, Dave Hanks (INFO: The Time Meddler)
Worldbuilding[]
Foods and beverages[]
- Steven picks blackberries for breakfast.
- The Doctor drinks mead from a horn.
History and time travel[]
- The Monk claims to have helped the building of Stonehenge with an antigravitional lift.
- The Doctor cites the "golden rule about the space and time travelling: never, never interfere with the course of history".
- The Monk plans to provide humanity with science and technology years ahead of their time after he's completed his plan to destroy the Viking fleet; he plans to give Shakespeare the chance to see his play Hamlet on television, and to give humanity jet airliners by 1320 after giving them enough knowledge to make it happen.
Story notes[]
- This is the first story in which the acronym TARDIS is said to stand for "Time and Relative Dimensions in Space", slightly different than the singular "Dimension" as was said in An Unearthly Child. This was an error made by Maureen O'Brien during recording and was retained through much of the series' history.
- All episodes exist as 16mm black & white film telerecordings, though "Checkmate" is still missing a 12-second sequence showing the Vikings Ulf and Sven being stabbed to death by Wulnoth and the Saxons; no complete copy of the episode is known to exist. The audio portion of this sequence survives from an off-air recording and is included on the DVD release as a special feature.
- Peter Purves is credited as "Steven Taylor" for "The Watcher", and as "Steven" for "The Meddling Monk" to "Checkmate".
- William Hartnell was on holiday for the week "The Meddling Monk" was recorded, and so the Doctor's appearance is limited to the reprise and heard only as a pre-recorded voice-over.
- A print of the episode "The Meddling Monk" is held in the Film & TV Library. Incomplete prints of all episodes were found in Nigeria in 1985. Complete prints of "The Watcher" and "A Battle of Wits" were returned to the archive in 1992.
- Tele-snaps for this story are held by a private collector.
- No "Next Episode" caption is present on "Checkmate", making it the first episode not to do so. Instead, an extended version of the theme music is heard as images of the three lead actors appear on-screen in front of a space backdrop. This differs from the final serial of the last season, The Reign of Terror, which provided a caption for the first episode of Planet of Giants.
- Some versions of this story, especially those distributed in the U.S. during the 1980s, cut the sequence in "The Watcher" where the Doctor and Vicki discover Steven hiding in the TARDIS.
- This story was chosen by fans to represent the William Hartnell era by fans to be rebroadcast for Doctor Who @40.
- Footage of the Viking ship was taken from a BBC Newsreel item about a Viking recreation on the south coast of England. In the remastered DVD version this footage is restored from the original 35mm film recording; the picture quality of this restoration reportedly appeared too good compared to the restored videotape and 16mm location footage, leading the restoration team to digitally add grain and soften the image to make it better resemble the rest of the episode. The complete item can be found on the DVD release as an extra.
- This was Douglas Camfield's last four-part story until Terror of the Zygons over a decade later.
- The interior of the Monk's TARDIS is actually the set of the Doctor's, albeit slightly redressed — i.e. with the control console standing on a raised platform.
- According to Donald Tosh, the Doctor addressing the camera and mentioning William the Conqueror's future arrival was ad-libbed by William Hartnell. "Of course none of this had been in the script. And we were all supposed to be ever so grateful! He had remembered vaguely what Dennis's dialogue was all about and thought that we'd be disappointed if he didn't manage to get the plot across. For some technical reason we weren't able to shoot it again so it had to stay in."
- During production of this story, new producer John Wiles began taking over production duties. William Hartnell, displeased at the number of changes undergoing the production, play-acted throwing a temper tantrum during the rehearsal of this story.
- Peter Purves described the story as "a nice bit of nonsense".
- Douglas Camfield liked the comedy in the story as a contrast to the heaviness elsewhere in the season.
- Several characters were named after real people - Edith for one of Harold's sisters, Ulf for an earl and uncle to Harold, Sven from Harold's brother Sweyn, and Wulnoth derived from Harold's grandfather, Wulfnoth.
- William Hartnell became the only original cast member with this serial following the departure of William Russell and Jacqueline Hill in the previous story.
Ratings[]
- "The Watcher" - 8.9 million viewers
- "The Meddling Monk" - 8.8 million viewers
- "A Battle of Wits" - 7.7 million viewers
- "Checkmate" - 8.3 million viewers
Myths[]
- Peter Butterworth was chosen because of his roles in Carry On films. (Butterworth did not appear in a Carry On film until August 1965.)
- The Doctor's race are identified as Gallifreyans. (The word Gallifrey is not used until the Third Doctor story The Time Warrior.)
- Because "Checkmate" ends with no lead-in to the next serial, but ends with a unique sign-off showing close-ups of the three leads, it's been suggested that perhaps this was at one point expected to be the final episode of the series. (The ending is rather similar to The Reign of Terror and there is no indication the series was in danger of cancellation at this point, given that it was still the height of Dalekmania.)
- The Doctor and the Monk have never met before. (The Monk recognises the Doctor; however, the Doctor fails to recognise the Time Meddler at first. He later asks him, And what are you trying to get up to this time?. The First Doctor failed to recognise the Master at first in The Five Doctors as well.)
- The Monk is fifty years younger than the Doctor or the Monk left Gallifrey fifty years after the Doctor. (The Doctor recognises the Monk's TARDIS as a Mark 4, and he later guesses, "I would say that I am fifty years earlier".)
- In "The Meddling Monk", the Doctor throws his breakfast through the cell door's viewing hatch into the Monk's face. (The Monk is actually hit by a large amount of water, possibly the contents of a washbasin. The Doctor's throwing his breakfast at the Monk was added by Nigel Robinson for the novelisation.)
Filming locations[]
Production errors[]
- A deadbolt lock can be seen in the monastery door in "The Watcher", albeit without any handles attached to it.
- The blankets seen at the beginning of "A Battle of Wits" don't match those seen in "The Meddling Monk".
Continuity[]
- The Doctor and Vicki discuss the departure of Ian and Barbara (TV: The Chase) and the Doctor mentions his granddaughter Susan. (TV: The Dalek Invasion of Earth)
- The Doctor doesn't like to be called "Doc". (TV: The Dalek Invasion of Earth, The Five Doctors, The Twin Dilemma, The Ultimate Foe, Dreamland)
- The Monk is next seen in TV: The Daleks' Master Plan.
- Steven stowed away on board the TARDIS at the end of the previous story, TV: The Chase.
- Vicki refers to their visit to New York during the events of TV: The Chase, including the Empire State Building.
- Steven is not the first human not believing the TARDIS is a time machine to become a companion. As he did for Ian and Barbara, the Doctor takes him to the past to prove Steven is wrong. (TV: An Unearthly Child)
- Vicki describes to Steven the TARDIS' ability to blend into its surroundings as suffering from a "technical hitch" the Doctor will repair one day. It was stuck in the form of a police box when it left London in 1963. (TV: An Unearthly Child)
- The Doctor's handwriting is completely different from that in TV: The Sensorites.
- The Doctor and Vicki previously visited another monastery, Sonning Palace, in 1400 in the company of Ian and Barbara. (AUDIO: The Doctor's Tale)
- The Eighth Doctor and his companion Mary Shelley later met Harold Godwinson during the Battle of Hastings. (AUDIO: Mary's Story) The Sixth Doctor and Peri Brown encountered Harold, who was operating under the alias of "Hereward the Wake", in the aftermath of the battle. (PROSE: The Real Hereward) Furthermore, the Doctor's TARDIS' helmic regulator was hit and incapacitated by an arrow when the Eleventh Doctor visited the battle. (WC: Pond Life)
- Following his encounter with the Monk, the Doctor installed a device in the TARDIS which was designed to detect further attempts to alter history. (PROSE: The Schoolboy's Story)
- Seven lifetimes later, the Eighth Doctor once more encountered the Monk, once more disguised as a monk, in Kell's Abbey. He gave Tamsin Drew a summary of his original encounter with the Monk after they'd found a Time Scoop built with the dematerialisation circuit of the Monk's TARDIS. (AUDIO: The Book of Kells)
Home video and audio releases[]
DVD releases[]
- Region 2 - 4 February 2008 (PAL)
- Region 4 - 2 April 2008 (PAL)
- Region 1 - 5 August 2008 (NTSC)
Contents:
- Commentary by Verity Lambert (producer), Peter Purves (Steven Taylor), Donald Tosh (Story Editor) and Barry Newbury (Designer), moderated by Clayton Hickman
- Verity Lambert Obituary - A concise essay looking back at the career of one of Doctor Who's co-creators.
- The Lost Twelve Seconds - A small part of episode four is still missing, and this short item uses an off-air audio recording and an original script to place the missing 12 seconds in context
- Restoration - A featurette showing the techniques used in the restoration of this story
- Stripped for Action - The First Doctor - A look back at the First Doctor's colourful comic strip adventures.
- Verity Lambert Gallery - A collection of photographs of the trailblazing producer
- Radio Times Billings - Original listings from Radio Times in PDF format (DVD-ROM PC/Mac)
- Photo Gallery
- Production Subtitles
- Coming Soon Trailer - The Five Doctors: 25th Anniversary Edition
Rear Credits:
- Starring William Hartnell with Peter Purves and Maureen O'Brien
- Written by Dennis Spooner
- Produced by Verity Lambert
- Directed by Douglas Camfield
Notes:
- Editing for the DVD release was completed by the Doctor Who Restoration Team.
")
")
")
Blu-ray releases[]
The story was released on Blu-ray in the UK on 5 December 2022, as part of the box set The Collection: Season Two.
Digital releases[]
This story is available:
VHS releases[]
This story was released as Doctor Who: The Time Meddler.
- It was released as part of The First Doctor Collection in the UK.
- It was released as part of The End of the Universe Collection in the US as well as being released separately.
- Editing for the VHS and DVD releases was completed by the Doctor Who Restoration Team.
")
")
")
")
")
Footnotes[]
External links[]
- The Time Meddler at the BBC's official site
- The Time Meddler at RadioTimes
- The Time Meddler at BroaDWcast
- The Time Meddler at the Doctor Who Reference Guide
- The Time Meddler at Shannon Sullivan's A Brief History of Time (Travel)
- The Time Meddler entry at Encyclopedia of Fantastic Film and Television
| ||||||||||||||||||||||||||||||||||||||||||||