The Rebel Flesh was the fifth episode of series 6 of Doctor Who.
Like many previous stories, it saw the Doctor duplicated. It was the second time that the Eleventh Doctor was copied following The Eleventh Hour. It introduced the Flesh concept to the Whoniverse and showed the Doctor had an ulterior motive for wanting to get rid of Amy and Rory for a while.
It marks yet another time the Doctor has tried to make peaceful negotiations with humans and another species but failed due to one side taking a life. This previously happened in Cold Blood of Series 5.
It was notable for the first use of motion control cameras since The Mysterious Planet. It contained the first instance of motion control use on actors rather than inanimate models in Doctor Who history.
Synopsis
The Eleventh Doctor, Amy Pond and Rory Williams visit an acid-mining factory. A solar storm hits the factory, turning the workers' gangers into self-aware individuals. The Doctor must mediate between the original workers and their rebellious gangers.
Plot
On an island, factory workers Jennifer, Buzzer, and Jimmy move through a monastery. In a small chamber containing one large, circular vat filled with acid, they wear acid suits to protect themselves. Jennifer is perplexed by the acid readings. Buzzer teases her. In response, she hits his leg, and he falls into the vat. "Way to go twinkle toes" Jimmy sneers. Buzzer asks to be pulled out but Jimmy says that there's no point bringing him back legless; Buzzer notes his nerve endings gave out, meaning he can't feel anything. Annoyed, Jimmy says they'll have to write this up for their boss.
Jimmy and Jennifer leave the chamber, as Buzzer calmly waves them off. Oddly, Buzzer is next seen walking down the corridor towards them; he says that he could claim workman's compensation as he did just have an accident in the workplace. Sternly, Jimmy points out just one acid suit costs a bomb. As they walk off, Jimmy tells Buzzer that if this causes him to stay another day due to the schedule being pushed back, he'll kill him again as it will make him miss his son's birthday. Back in the acid room, the first Buzzer's face dissolves in the pool of acid with a look of agony.
In the TARDIS, the Eleventh Doctor scans Amy for pregnancy and continues to get uncertain readings. At the same time, Amy and Rory are playing darts while listening to Supermassive Black Hole. According to the scoreboard, Amy is winning and Rory is bad at the game. The Doctor turns off the music, asking Amy and Rory if they'd like to go for fish and chips; they're for it. He says he'll drop them off and come back when they're done. Amy wonders what he'll be up to in the meantime. The Doctor states "other stuff." Amy says that they'll join him as there's no way he's ditching them.
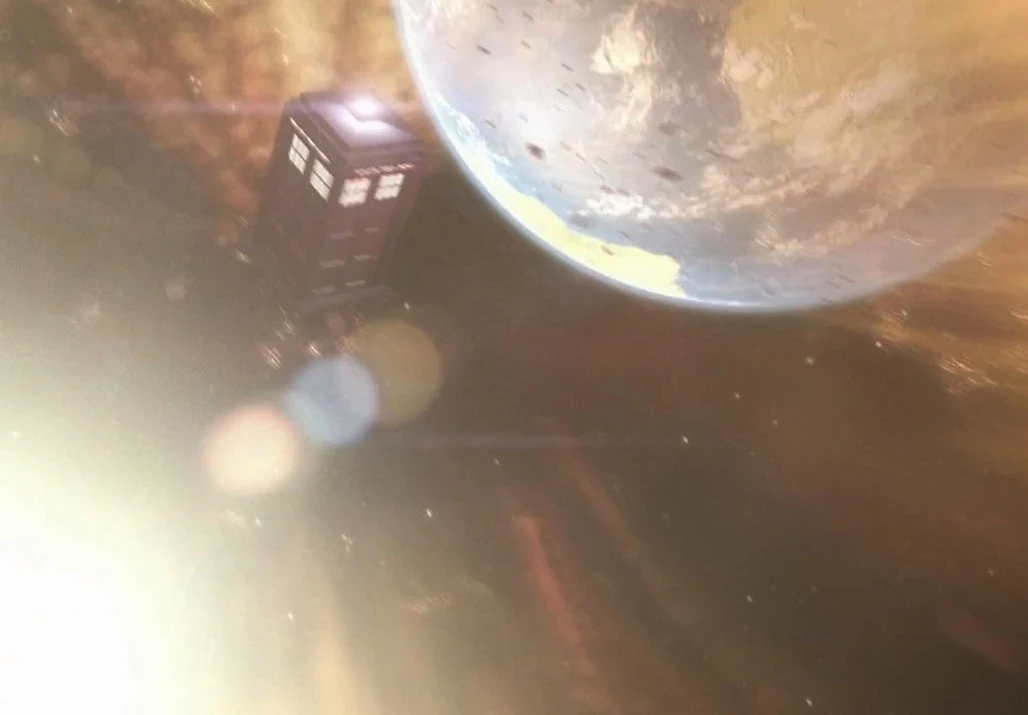
The TARDIS flies out of control.
Suddenly, the TARDIS shakes violently. A quick scan reveals a solar tsunami is hitting the TARDIS, causing it to fly out of control. The Doctor attempts to steer the TARDIS to safety, but gives up, yelling for Amy and Rory to take crashing positions. Everyone ducks and covers, as the sound of an object flying at high speed rings through the console room.
However, instead of crashing, the TARDIS lands with a soft thud. The Doctor heads outside to see where they have landed. It's the very same island as earlier, but the Doctor assumes they've arrived at a 13th century monastery; Amy thinks this means they're in the Medieval Era. However, Rory tells her that it's not likely, prompting her to ask if he's an expert on the Medieval Era. Rory meekly points out that he can hear Dusty Springfield playing nearby; OK, not the 1200s. Rory notes his mother is a fan of Dusty's music, to which the Doctor says he is too.
They investigate the interior, not knowing someone is watching them. Seeing piping, the Doctor scans it with his sonic screwdriver, noting that it has a ceramic interior, meaning something corrosive is being pumped off the island. Rory touches a wet spot with his finger and pulls his hand back in pain. The Doctor tells him it's old acid; Rory's lucky it wasn't fresh, or his hand would have been dissolved. The monastery has been modified into a 22nd century factory for mining acid. An alarm goes off and the Doctor notices a reading on the sonic, telling Amy and Rory that "almost people" are coming.
Searching for these people, the trio end up in a chamber where they spot five harnesses. Four are occupied by sleeping workers. Amy wonders if they're prisoners or meditating; the Doctor tells her it falls into the "or what" category. A recorded voice from speakers tells them to halt and remain calm; the Doctor notes that they've complied with the first request, but asks if any of them are actually calm. The factory's "security" quickly surrounds them and the time travellers realise they are exact doubles of the people sleeping in the harnesses. The foreman, Miranda Cleaves, tells the trio that unless they work for Morpeth Jetsan, they're in a lot of trouble. Brandishing the psychic paper, the Doctor claims to have come from the new meteorological department; he warns them that a solar wave — bigger than the one they've just survived — is on its way. They're all in danger. However, Cleaves is more concerned with doing their jobs than the lives of her workers. The Doctor requests to see her "critical system."

The Doctor examines the Flesh.
Cleaves leads the Doctor, Amy and Rory to a vat of Flesh — fully programmable matter which can replicate any living organism. All of the workers in the room, apart from Jennifer, are Flesh "Gangers," controlled by the real people who are sleeping in the harnesses. The site is far too dangerous, and they were losing workers every week; therefore, the military commissioned the creation of the Gangers, who could mine the site and interact with the acid without putting anyone in danger. The Doctor is concerned by their low opinion of the Flesh, but intrigued by its function; he scans it with the sonic screwdriver and reaches out to touch it. He grimaces in pain and says that it felt like, while he was scanning it, it was scanning him. Jennifer is ordered to her harness by Cleaves; a small amount of Flesh pours into a tub attached to it. Eyes and a mouth form as the Flesh compresses into Jennifer's shape and colour begins filling in. After Jennifer's Ganger emerges, the Doctor jokes, "I see why you keep it in a church; the miracle of life." The Doctor reminds Cleaves of the impending solar storm, but she refuses to allow her team to leave the island.
The Doctor asks for the location of the security systems, being informed by Jennifer where they are. Investigating with Amy and Rory, the Doctor notes that the factory runs on solar energy; when the wave hits, there will be a debilitating power surge. "I've got to get to the cockerel before all Hell breaks loose. I never thought I'd get to say that again," the Doctor laughs, heading to the roof to the weathervane. However, despite his best efforts, the Doctor arrives too late and is knocked unconscious, falling to the ground as the solar storm hits. The acid pipes burst and leak everywhere, eventually causing the TARDIS to sink below ground. As the power surges, the Gangers flicker between their full human forms and semi-Flesh forms.

The Doctor gets to experience firsthand how Benjamin Franklin discovered electricity (again).
The Doctor awakes to see the weathervane gone and its stump smoking. Going off in search of the others, he finds Cleaves, who is deeply shaken and concerned for her team. They move back into the monastery, with the Doctor asking Cleaves how long they'd been unconscious; when she replies a few minutes, he insists that it has been at least an hour and that a lot could happen in an hour. Amy and Rory awake on the floor of the Flesh room and return to the harness chamber, where they find the rest of the team shaken after the power surge. Jennifer is in a state of shock, and Rory comforts her. The Doctor and Cleaves eventually join them. Cleaves informs the group that the Gangers should have melted into their pure Flesh forms, but the Doctor is uncertain — especially as Jimmy's records start to play throughout the monastery. It seems that the Gangers are controlling themselves now.
The group runs to the dining hall, which has been ransacked; the Doctor explains that the Gangers were merely searching for confirmation of their identities. The group has trouble accepting this and believe themselves to be in danger, with Buzzer citing a previously recorded case of Gangers going crazy; however, the Doctor shrugs this suggestion off. Seeing a house of cards Buzzer says was a trick taught to him by his grandfather, the Doctor explains that Buzzer's Ganger was taught by his grandfather as well; they have the entire identities of who controlled them in their heads. The Doctor tells everyone that they've willingly bequeathed their lives to their doubles; they are dealing with the miracle of life, not a mess that needs to be mopped up.
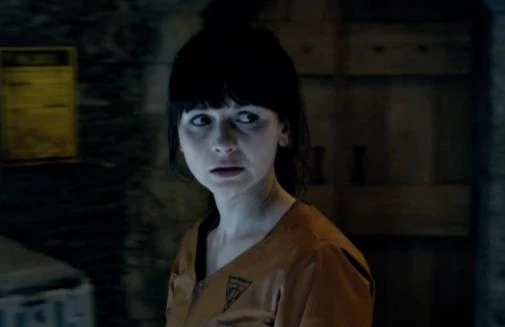
Jennifer feels ill and rushes to the toilets, closely followed by Rory to keep her protected from crazed Gangers. In the toilets, Jennifer vomits up Flesh while Rory has his back turned; terrified to realise that she's a ganger, she runs into one of the cubicles. As Rory steps in front of the sink and spots the Flesh, Jennifer's arm punches through the door of the cubicle and narrowly misses hitting Rory in the face, demonstrating tremendous elastic ability. Her neck also extends through the hole in the door, and she screams, "Let us live!" as Rory runs out of the room.
In the dining hall, the Doctor heats up a plate of food as Jimmy suggests arming themselves against the Gangers. The Doctor wonders if Jimmy is a violent man; when Jimmy replies in the negative, the Doctor explains that there is no reason to assume his ganger will be. The Doctor hands Cleaves the hot plate, though she doesn't react to this until he mentions that it is hot, at which point she drops it. Confused as to why she didn't feel the heat before, the Doctor calmly explains that her nerve endings haven't finished attaching yet, but that she'll stabilise soon enough. Cleaves turns away; when she turns back, she reveals her Flesh form. The workers demand to know where the real one is, but Cleaves runs out screaming.
Amy reminds the Doctor that Rory is with Jennifer, who was out of her harness. The Doctor, Amy and Dicken run after Rory and Jennifer, finding the aftermath of Jennifer's brief mental snapping. Recalling that the Doctor called the Gangers early technology, Dicken wonders why he's really at the factory. The Doctor gives a look towards Amy before insisting that the Gangers aren't violent, but scared and angry, and he needs to talk to them if he is going to fix what has happened. They continue through the monastery, but find many of the corridors blocked by leaking acid puddles. The Doctor proposes going to fetch the TARDIS and rushes off; Amy also goes off on her own to search for Rory. Jimmy returns to the dining hall and sends Buzzer and Dicken off to retrieve the acid suits.

Ganger Jennifer tells her story to Rory
Rory finds Jennifer's ganger in the locker room; she insists that she is Jennifer Lucas, not a mere factory part. Jennifer tells Rory about a memory of a time she was lost as a child and imagined a stronger version of herself as comfort. She takes offence when he asks her where the real Jennifer is and takes on full human form while yelling that she is just as real as the "other" Jennifer. Rory comforts her, accepting her and earning her trust.
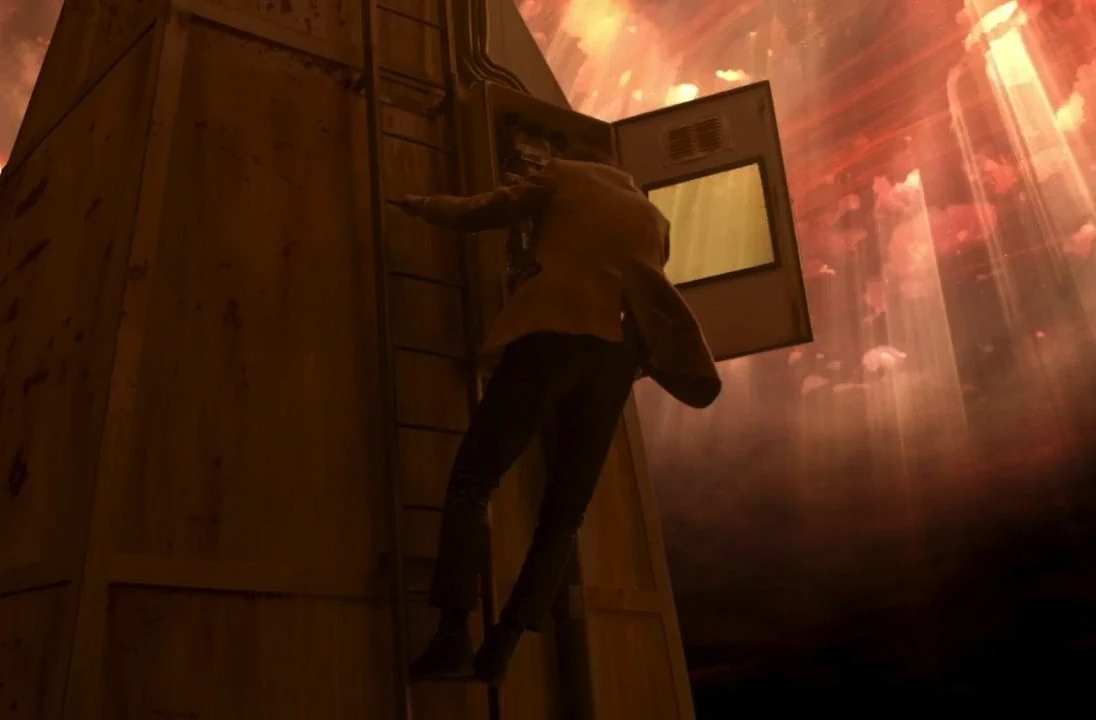
On his way to fetch the TARDIS, the Doctor returns to the vat of Flesh and scans it once more before leaving. The tub fills with Flesh, and slowly, a mouth takes shape in the liquid, whispering, "Trust me." Upon reaching the TARDIS, the Doctor is disappointed to find that it has almost completely sunk below ground; additionally, the nearby acid melts through his shoes, forcing him to abandon them and return to the monastery in his socks. Meanwhile, all of the Gangers — apart from Jennifer — have gathered in the acid room with the acid suits; they have the advantage now since they can move anywhere.
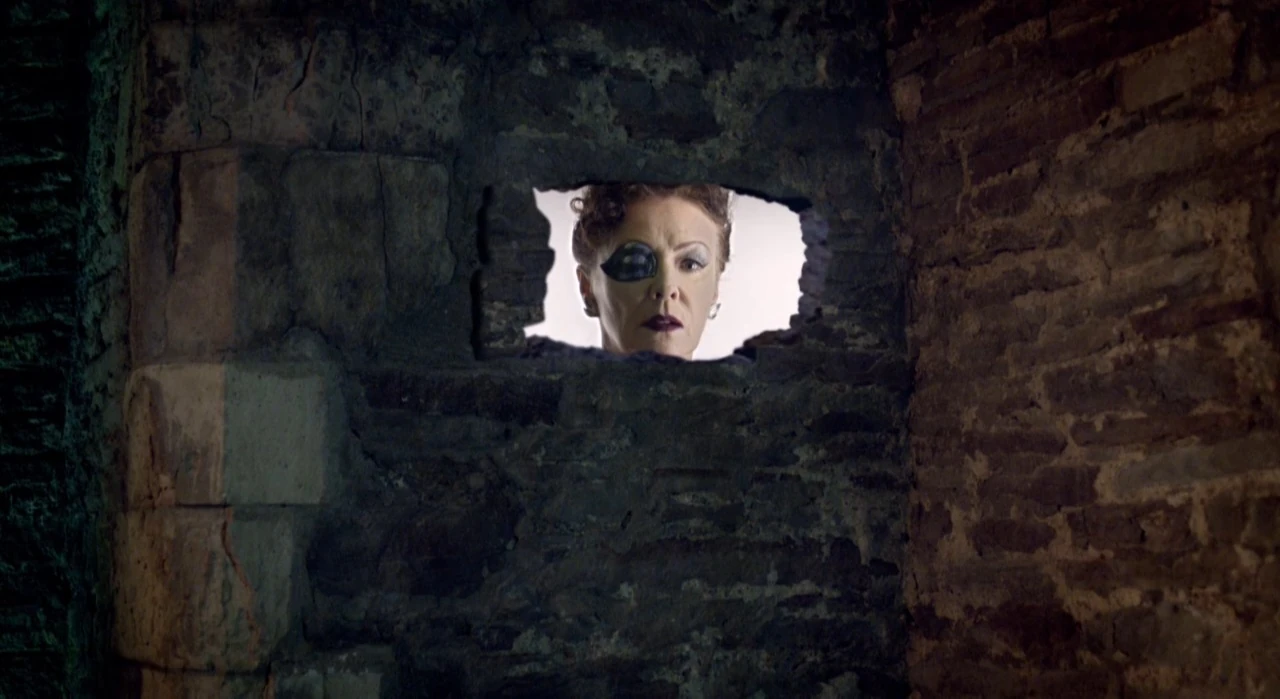
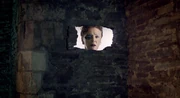
The Eye Patch Lady appears again.
While searching, Amy avoids an area filled with gas and comes to a dead end. She is horrified to see the eye-patch woman yet again. Not long afterwards, Rory and Jennifer's ganger discover her, and they are all joined by Buzzer and Dicken. The two factory workers are pleased to have found Jennifer, but Amy is quick to inform them that this is her ganger. Rory quickly becomes defensive, shouting that no one will touch her. Amy is shocked that Rory is being so defensive of another woman.
The Doctor, meanwhile, has discovered the Gangers hiding out in the acid room. He tells them that they should try cooperating with the originals, as a fight never ends well for anyone. The Doctor leads them, fully formed, back to the hall; he asks them to try keeping their appearances as it will make them less scary. They are observed from afar by a contemptuous Miranda Cleaves, who has been hiding out ever since the solar storm. Feeling like she's been watched, the Cleaves ganger turns her head, only to see no-one there.
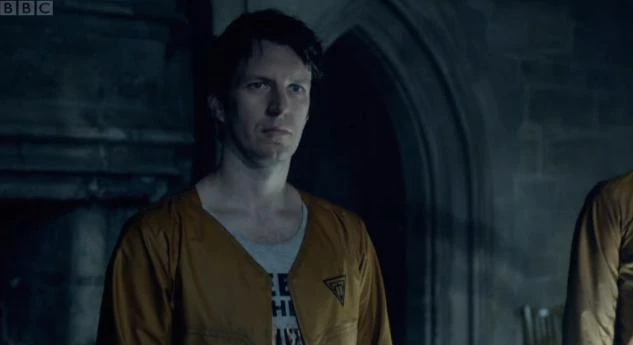
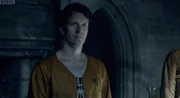
Ganger Buzzer.
They return to the dining hall, where Jimmy, Buzzer, and Dicken interrogate Jennifer's ganger about what she has done to the "real" Jennifer; Amy insists that they should do nothing until the Doctor arrives. And he does so right at the end of her sentence, followed by the Gangers. The Doctor requests replacement shoes and reminds everyone that the Gangers are truly alive; that destroying them is murder. Jimmy expresses some disdain until his ganger reveals his shared memories of his son's birth; they appear to reach some sort of unspoken truce, even volunteering to go and find Jennifer and Cleaves together.
However, before they can depart, the real Cleaves storms the room, brandishing a probe; Cleaves' Ganger explains she has a complex that makes her always want to be in charge even when she doesn't know what the hell is going on. Cleaves tries killing her double, but Buzzer's gets in the way to wrestle the probe from her. Buzzer is zapped and drops dead. The Doctor is furious; Buzzer's ganger had a human heart, and Miranda stopped it. Having witnessed Buzzer's murder, Jennifer's ganger wrongfully loses her faith in Rory, concluding humans can't be trusted; when Cleaves turns on her with the probe, Rory jumps on her, wrestling it away from her as the Gangers flee, terrified. The Doctor snaps at Cleaves for ruining their chances of working together, prompting Cleaves to arrogantly respond that it's "us or them." Returning to the acid room, Jennifer's ganger repeats this — "us or them."
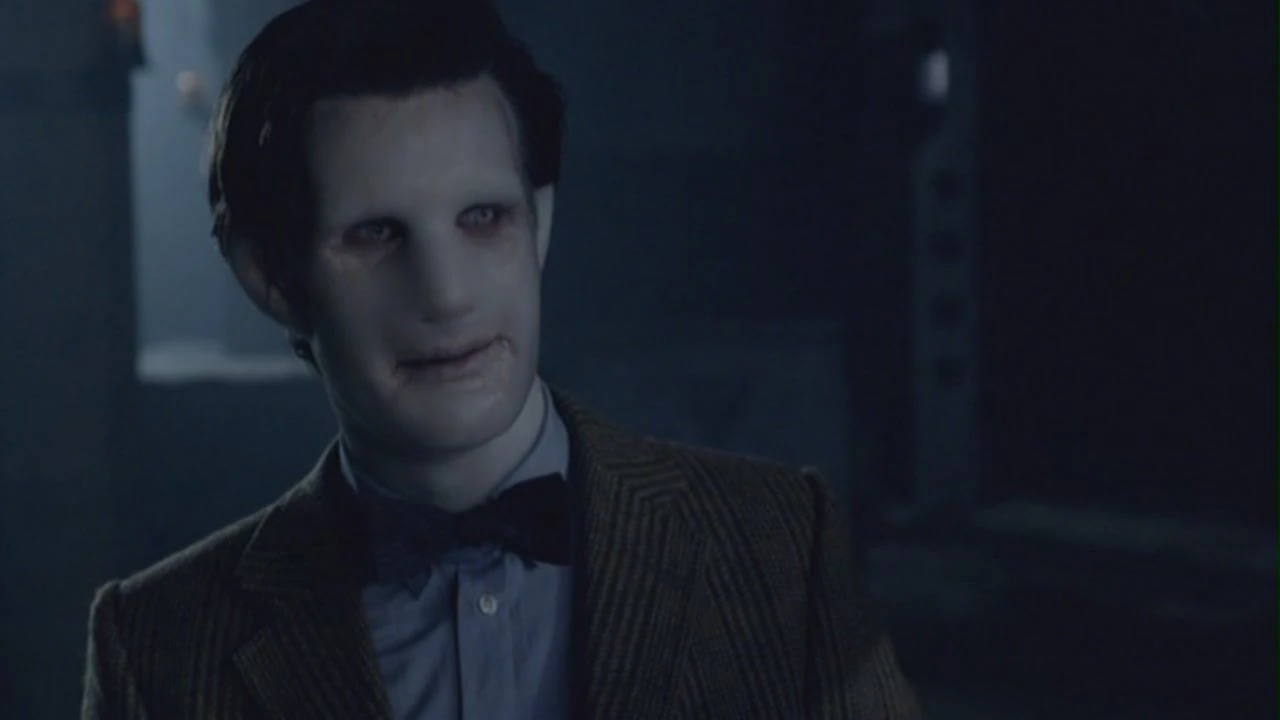
The Doctor meets himself, via the Flesh.
Sensing that the Gangers will launch an attack as retribution for Buzzer's death, the Doctor suggests hiding out in the monastery's most secure room — the chapel, which happens to contain the Flesh vat. The real Jennifer searches for Rory but is met with a sneak attack from above by her Ganger. Rory stops running toward the chapel when he hears Jennifer scream out. Despite Amy's protests, Rory separates himself from the group and goes off in search of Jennifer. As the Gangers advance on the chapel, the Doctor and his companions barricade themselves inside; however, the Doctor is quick to sense someone else's presence in the room and refuses to focus on the situation at hand. As Amy lectures him, the Doctor's voice rings out from the shadows. A semi-Flesh ganger of the Doctor steps into the light, adjusting his bow-tie. "Trust me," he says. "I'm the Doctor."
Cast
- The Doctor[1] - Matt Smith
- Amy Pond - Karen Gillan
- Rory - Arthur Darvill
- Jimmy[2] - Mark Bonnar
- Buzzer[3] - Marshall Lancaster
- Jennifer[4] - Sarah Smart
- Cleaves[5] - Raquel Cassidy
- Dicken[6] - Leon Vickers
- Eye patch lady - Frances Barber
Crew
| Executive Producers Piers Wenger, Beth Willis and Steven Moffat |
|
|
|
|
| Not every person who worked on this adventure was credited. The absence of a credit for a position doesn't necessarily mean the job wasn't required. The information above is based solely on observations of the actual end credits of the episodes as broadcast, and does not relay information from IMDB or other sources. |
|
Jay Harley was credited under their deadname as assistant director. |
References
- Nerve endings are mentioned.
- The Doctor says he wears size ten shoes and that his feet are quite wide.
- Jimmy and Buzzer refer to an incident on the Isle of Sheppey, in which an electrical surge resulted in a Ganger animating and killing its former controller.
- The Doctor suggests dropping Amy and Rory off on Earth for fish and chips.
- Rory recalls that his mother enjoyed Dusty Springfield.
Story notes
- Matthew Graham, who wrote this episode, is the co-creator of the series Life on Mars and its sequel series, Ashes to Ashes. Marshall Lancaster, who appears in this episode, plays the character of Chris Skelton on both of these shows.
- By the conclusion of this episode, the entire active TARDIS crew has either had or been a duplicate of themselves, although this is not fully revealed until later. (TV: The Pandorica Opens/The Big Bang, The Almost People)
- The scene involving the Doctor's investigation of an acid pipe outside the factory is reminiscent of the Doctor's investigation of tyre treads on Androzani Minor in TV: The Caves of Androzani.
- As is routine for post-2005 Doctor Who, a "NEXT TIME" trailer for the next episode is shown at the end of the episode.
- The third edition of AHistory dates this story to circa 2111, as there's no mention of the Dalek invasion, interstellar travel or space colonies.
Music
- When Amy and Rory are playing darts, the music in the background is "Supermassive Black Hole" by Muse.
- The song played by Buzzer on the turntable when the TARDIS crew arrives and later by the Gangers is Dusty Springfield's "You Don't Have to Say You Love Me", her version of the Italian song "Io che non vivo (senza te)".
- The music playing in the background when the vat of the Flesh is first shown is "Flying" by Tomandandy.
Ratings
- 7.35 million (34.1% market share; UK final)[7]
Filming locations
- Cardiff Castle, Caerphilly Castle, Atlantic College, Chepstow Castle - St John's Monastery
Production errors
- The positions of the two cards on top of the card pyramid slightly alter between shots. Also, when looking towards the Doctor, the top left card changes between being an eight of diamonds and a court card.
Continuity
- Holo-ads are an example of media in the 22nd century. (PROSE: Seeing I)
- The Doctor previously visited a monastery in his second incarnation. (TV: The Abominable Snowmen)
- The Eye Patch Lady reappears. (TV: Day of the Moon, The Curse of the Black Spot)
- The Doctor states, when informed that it has only been an hour, that "a lot of things can happen in an hour. An entire planet can be turned inside out in an hour..." (TV: Doctor Who)
- The use of the original humans going into harnesses, eyes-closed, to help create a Ganger clone, is very similar to what Martha Jones does with her clone in TV: The Sontaran Stratagem.
- The material from which the Gangers are created is referred to as "the Flesh". The new humans were previously referred to as that in TV: New Earth.
- The TARDIS is still confused as to whether Amy is pregnant. (TV: Day of the Moon)
- Rory mentions that rule one with the Doctor is, "Don't wander off." The Doctor himself said this in TV: The Girl in the Fireplace, The Empty Child and The Eleventh Hour. As always, the companions do wander off, much to the Doctor's annoyance.
- The Doctor has previously encountered "doubles" of himself in TV: The Chase, The Massacre, The Enemy of the World, Meglos, Arc of Infinity, Journey's End, The Eleventh Hour, and The Big Bang. He will again in TV: The Wedding of River Song.
Home video releases


Series 6, part 1 DVD cover
This story was released as Series 6, Part 1 with The Impossible Astronaut, Day of the Moon, The Curse of the Black Spot, The Doctor's Wife, The Almost People and A Good Man Goes to War on 11 July 2011.
The episode was later released in The Complete Series 6, which included the first and second half of the series, on DVD and Blu-ray on the 21 November 2011.
The documentary Monster File - The Gangers was featured on the DVD.
External links
Footnotes
- ↑ Smith also plays a Ganger duplicate of the Doctor.
- ↑ Bonnar also plays a Ganger duplicate of Jimmy.
- ↑ Lancaster also plays a Ganger duplicate of Buzzer.
- ↑ Smart also plays a Ganger duplicate of Jennifer.
- ↑ Cassidy also plays a Ganger duplicate of Cleaves.
- ↑ Vickers also plays a Ganger duplicate of Dicken.
- ↑ Doctor Who Ratings - UK final