The Ambassadors of Death was the third story of Season 7. It was the Third Doctor's first adventure into space without the use of his TARDIS. It also featured the first instance the TARDIS console was shown in colour format, and for that matter, removed from the TARDIS entirely. The Doctor had disconnected it and moved it to a study room inside UNIT headquarters now that his TARDIS was rendered inoperative, needing to utilise it in his experiments.
Synopsis
The Doctor joins UNIT's investigation of the mystery surrounding Mars Probe 7. Space Control, headed by Professor Ralph Cornish, has had no contact with the astronauts on board since it started back from Mars seven months ago. Now the Recovery 7 rescue mission has run into similar difficulties.
This second ship gets back to Earth, but the astronauts are kidnapped after landing and Liz Shaw notices that the Geiger counter is at maximum. It transpires that the ship's occupants were not the human astronauts after all but a trio of radiation-dependent alien ambassadors who had swapped places with them.
The Doctor makes a solo flight in Recovery 7 and docks with Mars Probe 7, still orbiting in space. He is intercepted by a huge, alien spaceship and taken on board, where he finds the real astronauts unharmed. The aliens' captain threatens to destroy the Earth unless their three ambassadors are released.
The Doctor is allowed to go and, after returning to Space Control, discovers that the kidnapping of the ambassadors is part of a scheme devised by xenophobic ex-astronaut General Carrington to discredit the aliens and convince the world's authorities to wage war against them. The Doctor and UNIT thwart his plans and arrange the safe exchange of ambassadors for astronauts.
Plot
Episode 1
With the United Nations Intelligence Taskforce providing security, the British Space Programme under Professor Ralph Cornish oversees the launch of the Recovery 7 probe. This has been sent to Mars to make contact with the missing Mars Probe 7 and its three astronauts, who lost contact with Earth eight months earlier.


Van Lyden is captured after linking up Recovery 7 and Mars Probe 7.
The pilot of Recovery 7 , Charles Van Lyden, makes contact with the probe but is then silenced by a piercing unearthly sound. The noise troubles the Third Doctor, who travels with his assistant Liz Shaw to the Space Centre to investigate the situation, offering insights into the origin and meaning of the sound, which he interprets as coded messages. When he says that the sound was going to be repeated, he is proven correct.
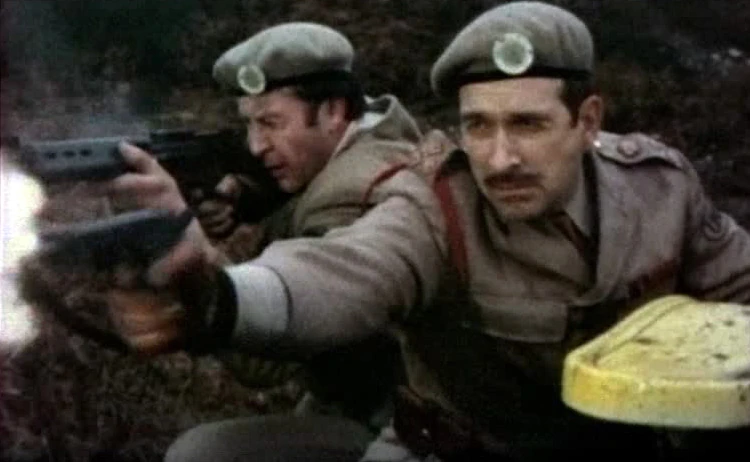
He also identifies a reply message sent from Earth and this is pinpointed to be coming from a warehouse seven miles away. Led by Brigadier Lethbridge-Stewart, UNIT troops attack the warehouse and engage in a gun battle with troops organised by General Carrington. The Brigadier captures several of the troops while Carrington escapes. Going to the computer room to talk to Taltalian, the professor pulls a gun on the Doctor and Liz...
Episode 2


The Doctor screams at the corporal to set off his military conditioning.
Taltalian demands the tape from the Doctor, but the Doctor manages to keep the tape to himself using a "transmigration of object" trick which was experimented with earlier in the story. Taltalian escapes. The Doctor with the Brigadier to meet one of the prisoners, a corporal, who was captured at the warehouse. The Doctor initially follows the niceties of interrogation, but as he walks out the door, he turns around and asks the man if he's had a cup of tea. When the man answers him, the Doctor catches him by surprise. He suddenly bellows in his face, "Stand to attention when you're talking to me and call me sir!" The man goes staunch and replies with, "Sir!" It keys in the Doctor's suspicion that this is man is conditioned to military protocol, and he deduces that he has been working over orders, but he cannot find out whose specifically.
The crew finds that Recovery 7 has separated early. Meanwhile, the corporal is freed by a rogue soldier. The computer that the Doctor is working with has been sabotaged by Taltalian (the computer stating that 2 and 2 make 5).
Recovery 7 lands, and they decide to take it back to space center. UNIT provides a truck for transport. A helicopter appears, and their men engage in a gunfight with UNIT men. The attackers succeed in taking the rocket, but the Doctor sees them. He tricks them with his Anti-thief device, and he retrieves the rocket.
The Doctor and the Brigadier confront the top man, Sir James Quinlan (who is in on the conspiracy). The astronauts have still refused to come out. The astronauts respond, but they repeat the same words over and over. The Doctor orders the capsule opened.
Episode 3
The craft is opened, and found to be empty, save for a recording of the astronaut's voices and a high amount of radiation. Carrington has ensured the contents – three space suited astronauts – are detained elsewhere, feeding them radiation to keep them alive. Carrington is now introduced to the Doctor by Sir James Quinlan, the Minister for Technology, who explains that he is head of the newly formed Space Security Department, and that his actions were to protect the astronauts as they had been infected with contagious radiation. Quinlan states that they did not want the public to become panic-stricken so Carrington had been acting with authority in his actions. By the time Carrington takes the Doctor and his friends to meet the astronauts, the situation has changed again.

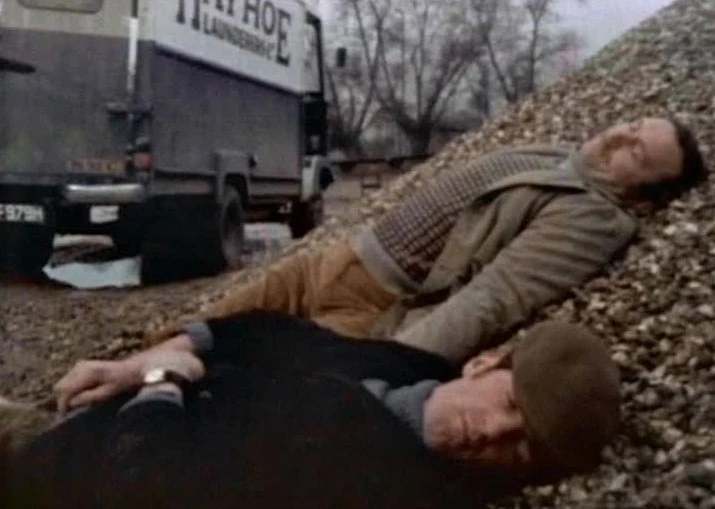
A criminal named Reegan has organised their abduction, killing the soldiers and scientists protecting them. Two of his henchmen are ordered to protect the astronauts, but the radiation they emit later kills them. Reegan, suited in protective clothes disposed of their irradiated bodies in a Hertfordshire gravel pit, burying them under the rocks. He then returns to his laundry van. Covering his tracks with camouflage tactics, he pushes a dashboard button that flips over the van's number plate to another registration code. At the same time, the "Hayhoe Launderers Ltd" signage on the van changes to read "Silcock Bakeries". Later on, the worker manning the industrial shovel uncovers the bodies when sifting the gravel.
When the Doctor and Liz examine the situation they work out that human tissue could not have withstood the degree of radiation emitted to the astronauts, who are still in orbit, meaning the three space suits contain alien beings instead. Reegan and his own scientist, Lennox, a disgraced Cambridge professor, are keeping the aliens alive, thinking the radiation needs to disperse, but they are weakening. Reegan enters their locked chamber to check up on one that collapses, but the alien recovers, thrusts him into a wall, and attempts to escape. Lennox flees, running up to find the laboratory exit locked, nearly getting him killed by the advancing alien. It runs out of strength again and falls down the stairs before laying a hand on him. Reegan recovers from the attack, disregarding Lennox's anger about locking the door. They realise the aliens need radiation to survive and begin dosing them with isotopes.
In order to aid Lennox in maintaining the alien beings while they are incarcerated, Reegan lures Liz and the Doctor into the open by issuing a false announcement that the Brigadier wants them to examine the bodies of the radiation victims now uncovered in the gravel pit. The Doctor chooses not to go, wanting to ready Recovery 7 for another flight into space rather than wait for Recovery 8, as its radiation has dissipated. Soon after Liz departs, the Brigadier walks in unexpectedly and the Doctor learns he didn't send for them. Lethbridge-Stewart immediately gets after Liz, who is now on her way to Hertfordshire in Bessie. Another car staked out on a side road waits for her to pass, then takes chase from behind and Liz fights to stay ahead of it. However, the horsepower of the modern vehicle quickly outpaces the vintage car and overtakes Bessie on a straight patch of road. Liz is forced to stop and bail out in a sprint, where Reegan's henchmen attempt to capture her. The chase leads to a pier, where Liz fights off one man, but slips over a railing as another man grabs her by the legs, and she dangles helplessly above a death drop.
Episode 4
Liz is saved by the henchmen and brought to Reegan, who forces her to help Lennox. Meanwhile, the Doctor learns that Taltalian was ordered by Carrington to sabotage the equipment, and receives a telephone call from Reegan warning him to stop interfering, holding Liz's life ransom.
Lennox lets Liz escape from the villain's hideout, but she is captured by Taltalian on his way to the hideout, where he gives Reegan a device that will translate the aliens' speech and give some control over them.

Reegan double-crosses Taltalian.
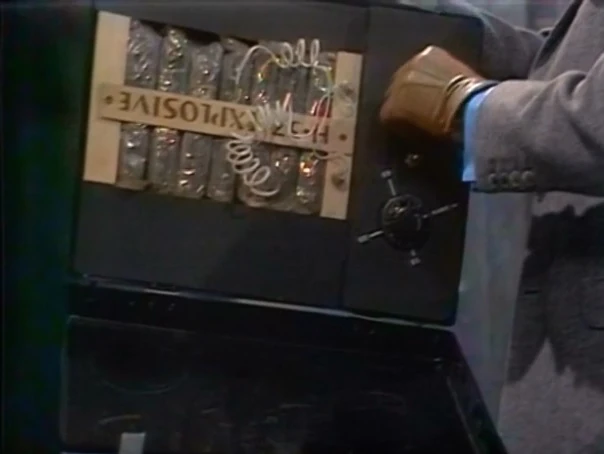
Reegan sends him back with a bomb to kill the Doctor, a suitcase packed full of explosives with a timer that can be set to go off at his leisure, but unknown to Taltalian it is meant to kill him as well. Reegan sets the dial to "0" behind Taltalian's back. Once opened, the suitcase will explode. Meanwhile, the Space Centre is met with hindrance after hindrance. The Doctor offers to go up in place of an astronaut. Taltalian arrives with the bomb. He opens the suitcase to set the dial, unaware it is already primed to detonate immediately. When the bomb detonates, it destroys the table beneath the suitcase, the Doctor is injured by blast debris, and Taltalian is killed, hit with the full explosive force of the bomb.
The Doctor discovers a device similar to the device he's building, but in Taltalian's position. The aliens are sent on a killer rampage at the Space Centre, killing Quinlan and others. As the Doctor checks Quinlan's prone body, he is approached from behind by one of the aliens.
Episode 5

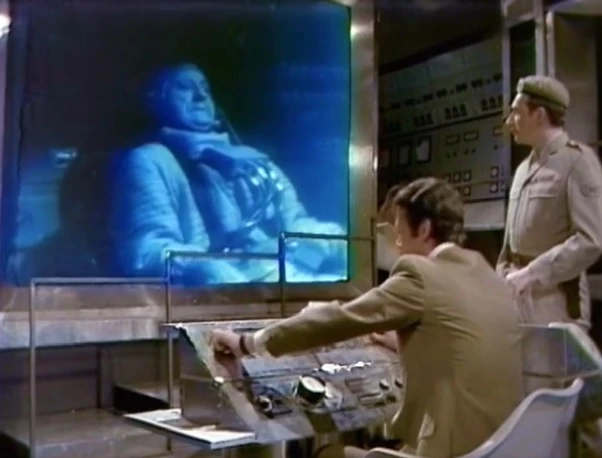
Mission control hurries to rescue the space-bound Doctor from a collision with the Sun.
The Brigadier shoots at the alien, drawing it away from the Doctor, but is unable to stop it from killing one of his men and escaping. Liz helps Lennox escape, and the scientist goes to UNIT, wanting protective custody against Reegan's wrath. Despite the obstruction of the authorities, Ralph Cornish is determined to organise another space flight to Mars to investigate the situation. With Quinlan dead, motions are put in place to choose a successor. The Doctor now decides to pilot the Recovery 7 probe ship himself, the ship's radiation levels having decreased considerably, but General Carrington puts up resistance toward the idea, suggesting it carry nuclear arms if it is to go into orbit. Regardless, the launch is carried out without further interruption from the general. Reegan, learning of Lennox's betrayal, plants a radioactive isotope in his cell underneath a food dish, which quickly kills him. Lennox orders the cell locked without knowing that he's sealed his fate. He uncovers the isotope and panics in his final moments. As the Doctor prepares to blast off, Reegan tries to sabotage the probe by increasing the feed of M3 variant, knocking out a UNIT guard, booting a maintenance worker over a railing, and striking down another worker near the main fuel supply. The overload of M3 threatens to launch Recovery 7 so far that it collides into the Sun. The Doctor survives the attempt on his life, telling the mission control to jettison the primary boosters early to reduce speed, with just enough power to reach orbit. The boosters are detached and he succeeds in piloting the probe so that it connects with Mars Probe 7. As Recovery 7 docks with the Mars probe, an unidentified object heads straight towards them at 7,000 miles per hour, on a collision course. The Doctor peers out the porthole of the shuttle, where he sees a large alien saucer approaching.
Episode 6

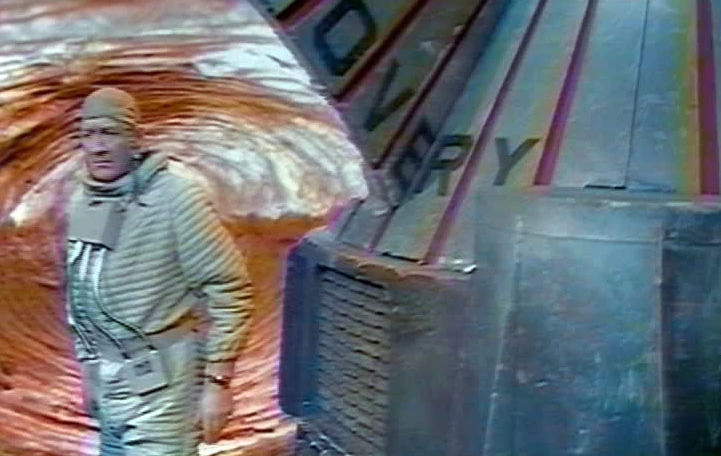
The Doctor on board the alien spacecraft.
The object is revealed to be an alien spaceship, which brings the Doctor aboard. Once there, the Doctor discovers the three original astronauts are unharmed but mentally deluded into believing they are in quarantine. An alien being now reveals itself to the Doctor and explains the humans are being held aboard the craft pending the safe return of the alien ambassadors. They had been sent to Earth following a treaty between the race and mankind, but the terms of this agreement have now been broken because of the detention of the ambassadors. The Doctor offers his personal guarantee to help return the ambassadors to their mother ship and resolve the conflict before a state of war is declared, and is permitted to leave the alien craft and return to Earth. When the Doctor touches down he is gassed and kidnapped by Reegan, who takes him to Liz. Reegan’s real paymaster, the real organiser of the situation, is revealed to them: General Carrington. Declaring that he had intended Reegan to kill the Doctor, the General pulls a gun on him, declaring that killing him is his "moral duty".
Episode 7
Reegan convinces Carrington to spare the Doctor and make use of his scientific ability. The General reveals his actions have been prompted by xenophobia driven by his own encounter with the alien beings when he piloted Mars Probe 6 some years earlier. His co-pilot, Jim Daniels, was killed on contact with the aliens and the General signed the treaty with the aliens to lure three of their number to Earth, where he hoped he could unveil their real agenda of alien invasion. The use of the ambassadors to kill people was similarly done to arouse public opinion against them. The next phase of his plan is to force the ambassadors to confess their plot on public television. Leaving the Doctor and Liz working on a new and improved communication device to translate the aliens, Carrington departs for the Space Centre, where he aims to unmask the alien ambassador before the eyes of the world – and then call on the powers of the Earth to blast the spaceship from the skies. Using his work on the translator as a cover, the Doctor transmits a morse code SOS to the Brigadier's men. UNIT soldiers then raid the secret base and rescue the Doctor and Liz, apprehending Reegan and his thugs. The Doctor races to the Space Centre, and he and the Brigadier apprehend Carrington before he can make his broadcast. Carrington is taken away, protesting he was only following his moral duty. He asks the Doctor if he understands why he took such actions, and the Doctor sadly sympathises with the general, regretting that it came to this. The Doctor arranges for Cornish and Liz to send the ambassadors back to their own people, after which the three human astronauts will be returned. He says his goodbyes to Liz and the Brigadier, departing back to his UNIT laboratory.
Cast
- Dr. Who - Jon Pertwee
- Liz Shaw - Caroline John
- Brigadier Lethbridge-Stewart - Nicholas Courtney
- Sergeant Benton - John Levene
- General Carrington - John Abineri
- Ralph Cornish - Ronald Allen
- Taltalian - Robert Cawdron
- Miss Rutherford - Cheryl Molineaux
- Collinson - Robert Robertson
- Grey - Ray Armstrong
- Sir James Quinlan - Dallas Cavell
- John Wakefield - Michael Wisher
- Reegan - William Dysart
- Lennox - Cyril Shaps
- Dobson - Juan Moreno
- Heldorf - Gordon Sterne
- Masters - John Lord
- Flynn - Tony Harwood
- Technician - Roy Scammell
- Control Room Assistant - Bernard Martin
- Control Room Assistant - Joanna Ross
- Control Room Assistant - Carl Conway
- UNIT Sergeant - Derek Ware
- Corporal Champion - James Haswell
- Private Parker - James Clayton
- Private Johnson - Geoffrey Beevers
- UNIT Soldier - Max Faulkner
- Alien Voices - Peter Halliday
- Alien Space Captain - Peter Noel Cook
- Charles Van Lyden / Alien Ambassador - Ric Felgate
- Joe Lefee / Alien Ambassador - Steve Peters
- Frank Michaels / Alien Ambassador - Neville Simons
Production crew
- Action - HAVOC
- Assistant Floor Manager - Margot Hayhoe, John Turner (both uncredited)
- Costumes - Christine Rawlins
- Designer - David Myerscough-Jones
- Film Cameraman - A.A. Englander, Tony Leggo
- Film Editor - Don Godden (episodes 1, 3-7), Chris Wimble (episode 2)
- Incidental Music - Dudley Simpson
- Make-Up - Marion Richards, Teresa Wright
- Special Sounds - Brian Hodgson
- Studio Lighting - Ralph Walton, Geoff Shaw, Dave Sydenham
- Studio Sound - Gordon Mackie, Brian Hiles (both uncredited)
- Title Music - Ron Grainer and the BBC Radiophonic Workshop, arranged by Delia Derbyshire (uncredited)
- Visual Effects - Peter Day, Ian Scoones
- Vision Mixer - John Barclay (uncredited)
- Writer - David Whitaker, Trevor Ray (episode 1, uncredited), Malcolm Hulke (episodes 2-7, uncredited)
- Script Editor - Terrance Dicks
- Production Assistant - Nicholas John
- Director - Michael Ferguson
- Producer - Barry Letts
References
- At the start of the adventure, the Doctor has not yet forgiven the Brigadier for his destruction of the Silurian base.
- "A Whiter Shade of Pale" plays.
- The Doctor is fixing the TARDIS' Time Vector Generator, which sends Liz fifteen seconds into the future.
- The Doctor and Liz receive data from real life radio telescopes: Haystack Observatory and Catalina in the US, Algonquin in Canada, Arecibo in Puerto Rico, Mullard Radio Astronomy Observatory ("Cambridge") in the UK, Culgoora in Australia, Dwingeloo in Holland, Nancy in France, and Onsala in Sweden.
- The Doctor can make solid objects vanish and, a few minutes later, reappear — a method he refers to as "transmigration of object".
- This is the first story to feature Benton with the rank of Sergeant.
- Liz can speak French.
- The aliens are not native Martians.
- The aliens' radioactivity is suggested as being conductible like electricity.
- General Carrington suggests sarcastically that the Doctor has nine lives.
- Carrington uses the Military Police to arrest the Brigadier and his men.
Story notes
- Working titles for this story included The Invaders from Mars, Invaders from Mars and The Carriers of Death.
- Part one of this story was the first time that the famous cliffhanger "sting" was heard at the end of the episode. However, it is actually not played under the cliffhanger as it would in years to come, but as an introduction to the credits. The following story, Inferno, would be the follow the same format. It would not be until the following season that the sting would be used in the most common form.
- An unusual title sequence was used for this serial, with the sequence cutting off after the show's logo, repeating the previous week's cliffhanger, then returning to the titles for the serial's name, writer and episode number.
- This was the last story written for Doctor Who by David Whitaker. It was his least favourite story, possibly because he ended up writing very little of it (see Writer credits above).
- Apart from Brigadier Lethbridge-Stewart, who retained his regular uniform, all UNIT ranks wore new futuristic-looking uniforms which only ever featured in this story. The usual velcro-fastened jacket, shirt and tie were replaced on this occasion with a zip-up jacket without lapels worn over a polo-neck sweater.
- The production text on The Ambassadors of Death DVD revealed that Reegan and his gang were originally Irish, and suggests it was changed after the Troubles started: "All in all, it might not have been the best moment to show Irish hoodlums planning to deploy a powerful new weapon."
- The story was made entirely on 625 line PAL colour videotape. However, up until 2011, the videotapes of all bar episode one were lost (having either been erased for reuse or junked), and the story was only available as 16mm black and white film telerecordings. The only existing colour tapes of episodes two to seven were non-broadcast standard 525 line NTSC off-air video recordings recovered from Canada in the 1980s, with episodes two to four and six and seven having an intermittent fault with the colour signal — resulting in rainbow-like patterning being superimposed across the picture. Although episode five was successfully restored to colour, countless restoration attempts on the remaining episodes failed until the Restoration Team re-colourised the story using the technique they used on episode three of Planet of the Daleks.
- The TARDIS console prop is shown for the first time outside of the TARDIS itself. Since the TARDIS had been temporarily "shelved" as a plot device, so had the elements of the console room set, which were placed in storage. The console was pulled out for studio recording in February 1970. Now seven years in use, it had suffered a degree of wear and tear, requiring the addition of replacement knobs and buttons for those that had fallen off. It would make its last appearance in the following serial, TV: Inferno before the prop's damage was diagnosed as extensive enough to warrant a redesign.
Ratings
- Episode 1 - 7.1 million viewers
- Episode 2 - 7.6 million viewers
- Episode 3 - 8.0 million viewers
- Episode 4 - 9.3 million viewers
- Episode 5 - 7.1 million viewers
- Episode 6 - 6.9 million viewers
- Episode 7 - 6.4 million viewers
Filming locations
- The exterior isotope factory scenes were filmed at Little Marlow Sewage Treatment Works.
- Southall Gas Works in Middlesex and Blue Circle Cement Works in Buckinghamshire were used for the Space Headquarters.
- Roads in Marlow and at the Marlow Weir were used for the chase sequences with Liz Shaw. Wycombe Air Park was used as Heldorf's lab, and Beacon Hill for Reegan's hideout.
- Aldershot, Hampshire, warehouses on White Street, TCC Condensers in Ealing, and Folley's Gravel Pit at Spade Oak were also used.
- All interior scenes were filmed at BBC Television Centre Studio 3.
Production errors
- In episode one, when the video screen retracts, the CSO image stays still for several seconds, exposing it as an overlay effect.
- At the climax at the end of episode one, the Doctor is confronted by Taltalian, who is wearing glasses and must pull his gun out of the waistband of his trousers. At the beginning of episode two, these glasses are gone and the gun is in Taltalian's hand from the start, revealing a mistake in the reprise following the end of filming for the previous episode.
- In episode three in the scene where the Brigader, the Doctor and Liz first meet General Carrington, as he gets up from his chair and says "I'm sorry?" to the Doctor, a brief glimpse of a boom can be seen above his head.
- In episode five, the word 'variant' — as in M3 variant — is spelt "varient" on location props. There is a close-up on one of the typos, where we see it rendered "M.3. Varient" — which raises the question: why is the number 3 written as an initial?
- In episode four the Doctor has a stick-able plaster from the explosion blast, but in episode five after the recap, his plaster is gone with no explanation given for where it went.
- The radioactive trefoil symbol is upside-down on all of the isotope canisters. The symbol should properly look like a black capital Y on a yellow background, not the other way round.
- Taltalian's accent is French in the studio and British on location.
- Recovery 7's nose changes colour between prop and model shots, with it being red on the model and grey on the prop.
- Quinlan's office safe slips about as the alien tries to open the door. This is caused by the indelicate movements of a person tasked with special effects, who is hidden behind the safe, rigging the explosive effects for the moment the alien blows open the safe.
- When the capsule is landing, it is moving across the map of the Atlantic far faster than the announcements indicate.
- Liz Shaw's tights change colour from week to week despite the fact she's a prisoner.
- The telephones on the desk where the Doctor sits to make the list of components he needs change position between episodes six and seven.
- Max Faulkner's UNIT Soldier dies — and is actually scripted as dying — in episode four, but then mysteriously reappears at the end of episode six. He's not credited in the later episode, despite briefly speaking. Given that INFO: The Ambassadors of Death reveals that episode six was edited in extreme haste, it's almost certainly a production error that Faulkner made it into the later episode.
- In episode seven, when an ambassador kills a policeman, the actor inside the suit can briefly be seen in a close-up shot.
Continuity
- The Doctor is still nursing a grudge against the Brigadier for blowing up the Silurian hibernation chambers in TV: Doctor Who and the Silurians.
- The Mars Probe space program appeared in two novels. PROSE: Who Killed Kennedy revealed that the shuttles were developed from technology taken from International Electromatics.
- In PROSE: The Dying Days it was revealed that the program was abandoned when Mars Probe 13 accidentally encountered the Ice Warriors and it was agreed that Earth would stay away from their territory.
- TV: The Christmas Invasion also involves aliens attacking Earth after they intercept a probe sent to Mars, even though they are not from Mars themselves.
- AUDIO: Red Dawn also features a manned mission to Mars.
- Benton makes his first appearance since TV: The Invasion.
- Taltalian and Quinlan received letters from the Apocalypse Clock which predicted the exact dates and times of their deaths. (AUDIO: The Last Post)
- The Doctor mentions the Time Vector Generator component of his TARDIS is deactivated. By comments made by the Second Doctor, it would suggest that because the Time Lords disabled this component, his TARDIS interior will have reverted to that of a normal police box, no longer bigger on the inside. (TV The Wheel in Space)
- Furthermore, the TARDIS console has been ejected from the console room, but the First Doctor once indicated that it sealed away the heart and power source of the ship beneath its time rotor. (TV: The Edge of Destruction) One can surmise that because the Time Vector Generator is disabled, the interior of the TARDIS has likely changed and the power source could not escape, while the console itself could be ejected from the TARDIS to administer repairs.
- The investigative journalist James Stevens and his wife Natasha Stevens watched Wakefield's reports on the Mars Probe 7 crisis on BBC3, as did millions of others across the United Kingdom. (PROSE: Who Killed Kennedy)
Home video and audio releases
VHS
This story was released on VHS in 2002 as a single selection, and in 2003 in the United States as part of the End of the Universe collection.
The story was released with over 90 minutes of the story in colour, and the remaining material in black and white — with subtle mixes between the colour and monochrome sections.
Episode one was taken from the original 625 line PAL colour videotape, episode four was black and white throughout, and episode five was a version with electronically restored colour. The remaining episodes were both colour and black and white.
Editing for the VHS release was completed by Doctor Who Restoration Team and also contains a black and white version of the trailer for the story before episode one and The Stages of the Restoration, a mini-documentary about the restoration techniques, after the last episode.
")
")
")
DVD
Originally planned for DVD release in 2011 alongside The Sun Makers, The Ambassadors of Death was delayed due to ongoing re-colourisation issues.[1] These issues were resolved to the best of the Restoration Team's abilities in November 2011. The serial was released on 1 October 2012. [2] The release is wholly in colour, with no option to see the parts that were monochromatic in the original VHS release.
")
DVD extras
- Audio Commentary with actors Caroline John (Liz Shaw), Nicholas Courtney (Brigadier), Peter Halliday (alien voices) and Geoffrey Beevers (Private Johnson), director Michael Ferguson, script editor Terrance Dicks, stunt co-ordinator Derek Ware and stunt performers Roy Scammell and Derek Martin, moderated by Toby Hadoke
- Mars Probe 7: Making The Ambassadors of Death with Michael Ferguson, Terrance Dicks, Derek Ware, Roy Scammell and assistant floor manager Margot Hayhoe
- Tomorrow's Times - Third Doctor- Presented by Peter Purves
- PDF Materials - Radio Times listings
CD
A CD of the original television soundtrack was released. This was an unusual move for BBC Audio, since typically they released soundtracks only for those stories which had missing episodes. This is one of the very few stories which visually exists in its (near) entirety to also get an audio release.
")
Footnotes
External links
- The Ambassadors of Death at the BBC's official site
- The Ambassadors of Death at BroaDWcast
- The Ambassadors of Death at the Doctor Who Reference Guide
- The Ambassadors of Death at Shannon Sullivan's A Brief History of Time (Travel)
- The Ambassadors of Death at The Locations Guide
| |||||||||||||||||||||||||||||||||||||||||